Linux for DevOps: Why It Comes First, and How to Install It
Part 1 of the free Linux for DevOps course: why more than 9 out of 10 cloud servers run Linux, what kernel, distro and shell really mean, how to install Ubuntu on Windows (WSL) or Mac (Multipass) in five minutes, and your first commands — plus the full 18-lesson roadmap.
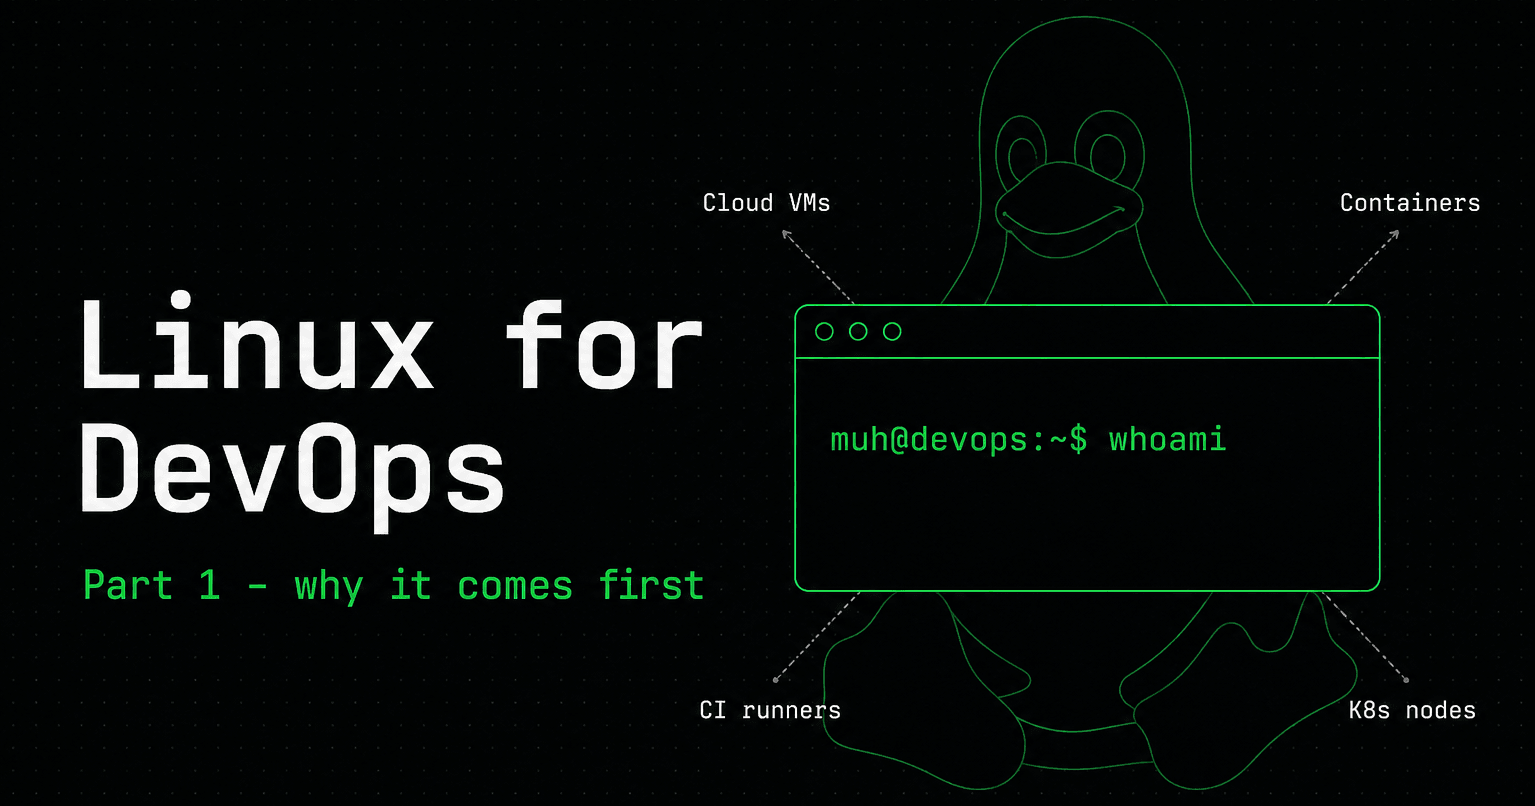
Sooner or later, every DevOps job comes down to the same moment. Something is broken, you open a terminal, connect to a server, and you get a black screen with a blinking cursor. No buttons. No menus. Just a prompt waiting for you to type. Whether that moment feels normal or frightening is the difference Linux makes.
This is part one of the free Linux for DevOps course, and the written companion to the first video. Here we cover the why and the setup: why Linux comes first on the DevOps roadmap, what people actually mean by kernel, distro and shell, how to get a real Ubuntu machine on Windows or Mac in about five minutes, and the first commands to prove it works. By the end you will have a Linux box of your own and a clear map of the next 17 lessons.
Why Linux comes first on the DevOps roadmap
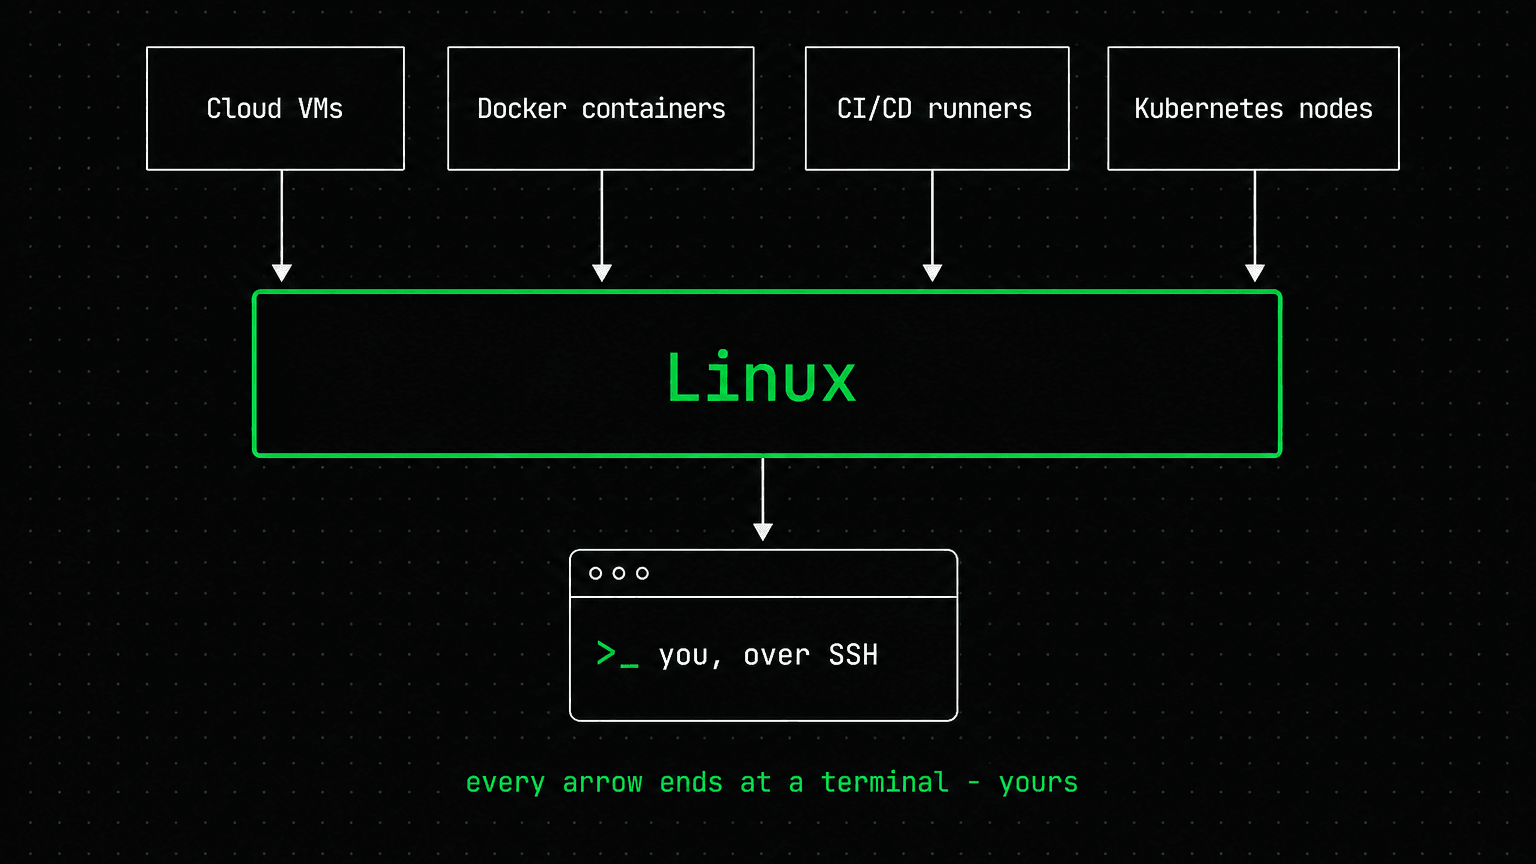
Look at what a DevOps engineer touches in a normal week: cloud servers, Docker containers, Kubernetes nodes, CI/CD runners, and log files. Almost every one of them is Linux. More than 9 out of 10 cloud servers run it, every Docker container is a Linux process, and a GitHub Actions runner is an Ubuntu machine. Even if you work on a Windows laptop, the thing you deploy to is Linux.
That is why Linux is step one and not an optional extra. Docker, Kubernetes, Terraform, Ansible, Jenkins, Prometheus — all of these tools assume you already know how to drive a Linux system. Their docs say things like "put this file in /etc" or "check the service logs" and never stop to explain what that means. Learn Linux first and every tool after it gets easier. Skip it and you spend years copying commands you do not understand.
There are four reasons the whole industry settled on it:
- →Free — no license fee, on one server or ten thousand. Your cost scales with hardware, not with permission slips.
- →Scriptable — anything you can do by hand, you can put in a script. That is the whole idea of automation, and it is why DevOps and Linux grew up together.
- →Stable — a well-kept Linux server runs for months or years without a reboot, and most software can be updated without restarting the machine.
- →The same everywhere — the commands you learn today work on AWS, Azure, Google Cloud, a Raspberry Pi, and inside a container. One skill, every platform.
And one very practical reason: when something breaks at 2am, the problem is usually a Linux problem. A full disk. A process that ate all the memory. A wrong permission. A port already in use. Fixing those is Linux work, not tool work — which is why this course spends its last module on exactly those tasks.
Kernel, distro, shell: three words people mix up
Before you install anything, get these three words straight. Most beginner confusion comes from mixing them up.
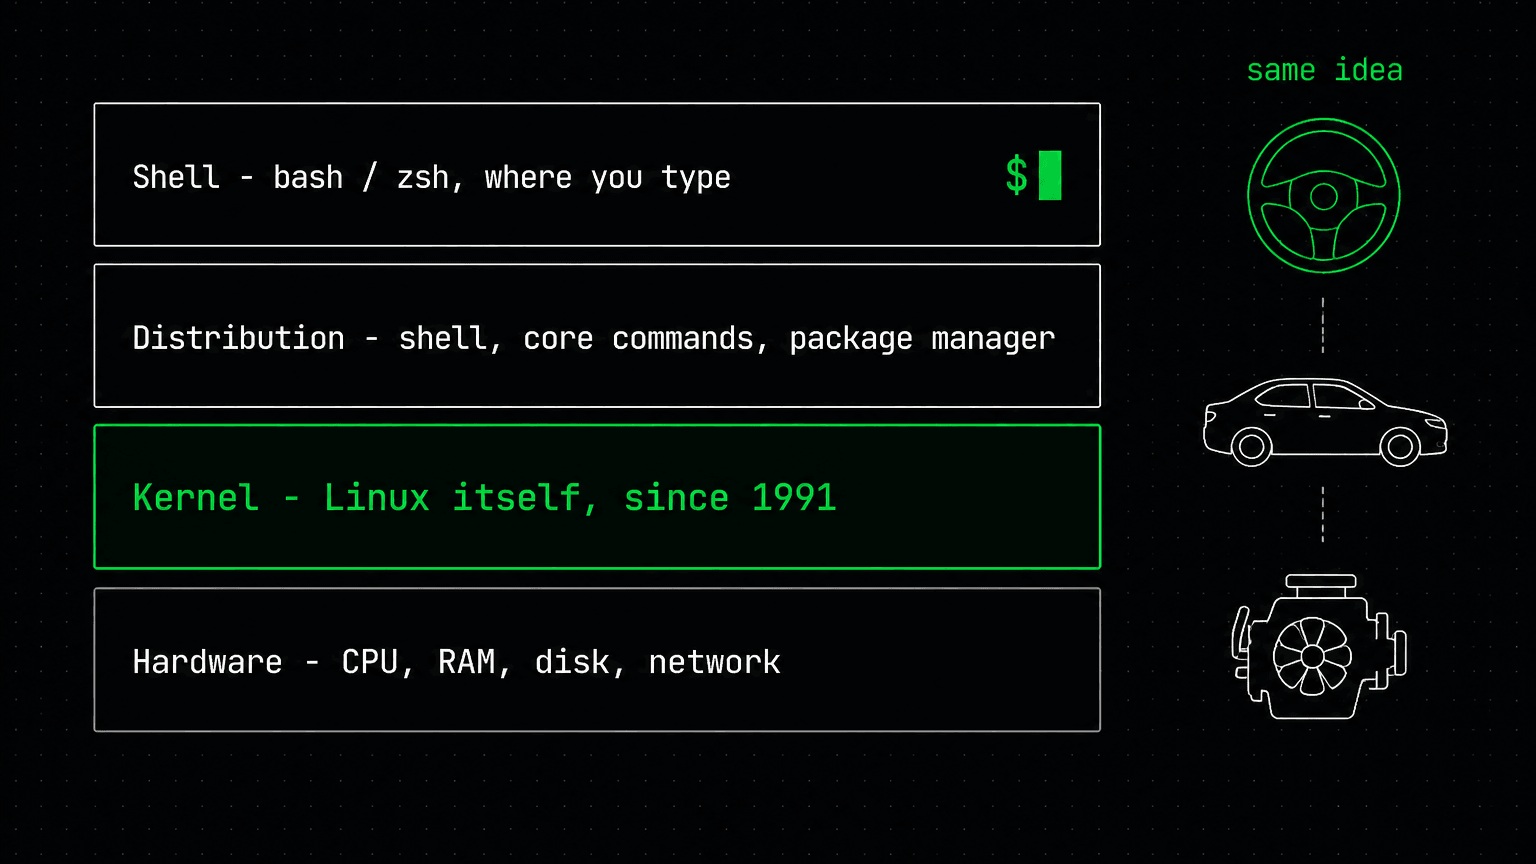
The kernel is the real Linux. It is the software that sits between your programs and the hardware: it hands out memory, shares the CPU between processes, and talks to the disk and the network card. Linus Torvalds released the first version in 1991, and strictly speaking, that kernel is all the word "Linux" means.
A distribution — a distro — is the kernel plus everything you need for a usable system: a shell, the standard commands, a package manager that installs software, and sensible default settings. Ubuntu, Debian, Red Hat Enterprise Linux, Rocky Linux, Amazon Linux and Alpine are all distros. They ship the same kernel with different choices around it.
The shell is the program that reads what you type, runs it, and prints the result. Bash is the most common one on servers, and zsh is the default on macOS. When people say "learn the command line", they mean learn the shell.
If you like analogies: the kernel is the engine, the distro is the whole car built around that engine, and the shell is the steering wheel you actually hold. Different brands of car, the same kind of engine — and the steering wheel works the same way in all of them.
Which Linux distribution should you learn?
This question stops more beginners than any real technical problem. The honest answer is that it matters far less than it looks. Around 95% of what you learn — files, permissions, processes, networking, scripting — is identical everywhere. The differences are mostly the package manager and a handful of file locations.
In practice there are three names worth knowing:
- →The Debian family — Debian and Ubuntu. Installs software with apt. Ubuntu is the default image on almost every cloud and the most common base image in Docker.
- →The Red Hat family — RHEL, Rocky Linux, AlmaLinux, Fedora and Amazon Linux. Installs software with dnf (older systems use yum). Common in banks, telecoms and large enterprises.
- →Alpine — a tiny distro used almost only inside containers. Installs with apk and is a few megabytes, which is why images built on it are so small.
Here is the entire difference between them, for the job of installing a web server:
# Ubuntu / Debian
sudo apt update
sudo apt install -y nginx

# RHEL / Rocky / Amazon Linux
sudo dnf install -y nginx

# Alpine (inside containers)
apk add --no-cache nginx
That is honestly how deep the gap goes. Learn one family properly and moving to the other takes an afternoon, not a career change. This course uses Ubuntu LTS, because it is what most cloud images, tutorials and Docker base images use — so what you type will match what you read everywhere else. "LTS" means long-term support: five years of security updates, which is why companies run those versions instead of the newest release.
Install Linux: pick the path for your computer
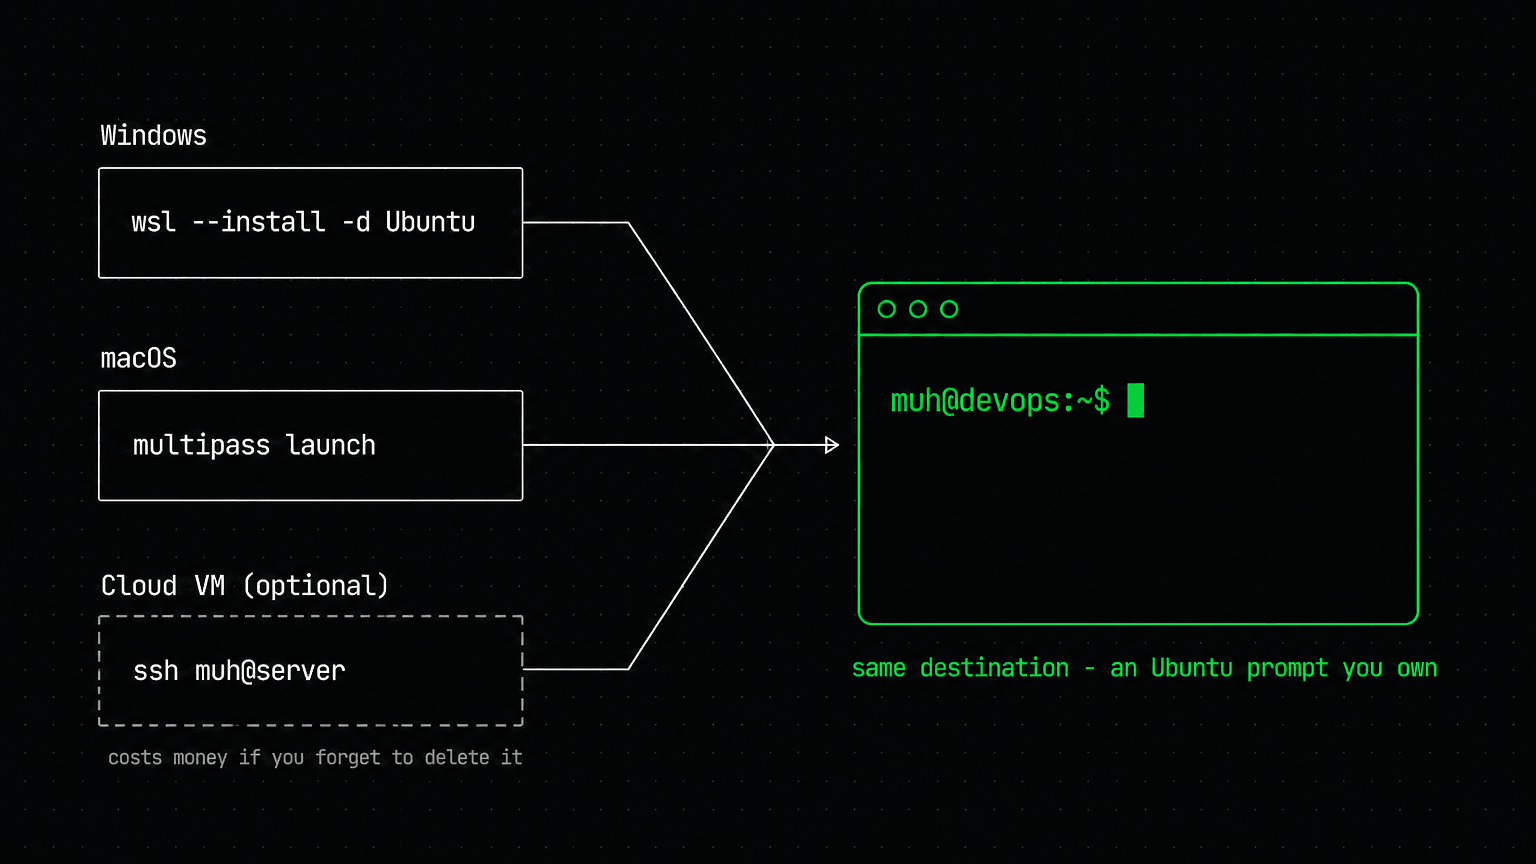
You do not need a spare laptop, a cloud account, or a credit card. Pick the line that matches the machine in front of you. Both paths give you a real Ubuntu system, not a simulator, and both can be removed with one command if you change your mind.
On Windows, use WSL — the Windows Subsystem for Linux. It runs a genuine Ubuntu inside Windows, next to your normal files, with no dual boot and no virtual machine to babysit. One command does the whole job:
# Open PowerShell as Administrator:
# Start menu -> type "PowerShell" -> right-click -> Run as administrator

PS> wsl --install -d Ubuntu      # installs WSL and Ubuntu together

# Then restart your computer.
# Ubuntu opens by itself and asks you to create a Linux username and
# password. These are separate from your Windows login - write them down.
#
# Later: open "Ubuntu" from the Start menu, or type wsl in any terminal.
If PowerShell answers "wsl is not recognized", install your pending Windows updates and try again — WSL needs Windows 10 version 2004 or newer, or any Windows 11.
On a Mac there is a trap worth knowing about: the macOS Terminal is not Linux. It is Unix, so ls and cd feel familiar, but there is no apt, no systemctl and no /proc. Follow a Linux tutorial in it and commands will fail for reasons that have nothing to do with you. So we create a real Ubuntu virtual machine with Multipass, which is three commands:
# brew is the Mac package manager. No brew yet? Install it from brew.sh

$ brew install --cask multipass     # the VM manager, made by Ubuntu's team
$ multipass launch --name devops    # create an Ubuntu VM called "devops"
$ multipass shell devops            # log in - you are now on Linux

# Worth keeping for later:
$ multipass stop devops             # shut the VM down when you are done
$ multipass start devops            # boot it again
$ multipass delete devops && multipass purge   # remove it completely
Already on a Linux desktop? Open your terminal — you are done. Two other options come up a lot, so let me be clear about them. A cloud VM (an AWS EC2 instance or a DigitalOcean droplet) is a great thing to practise on, and we use one in module 3 for SSH, but it is optional and it can cost money if you forget to delete it. Dual booting, where Linux and Windows share one disk, is real Linux but a poor first step: it needs disk partitioning and it goes wrong in ways that are hard to undo. Start with WSL or Multipass.
Whichever route you took, finish with one setup step: update the system, then install the few tools we use throughout the course.
$ sudo apt update && sudo apt upgrade -y
$ sudo apt install -y curl wget git vim tree htop unzip

# sudo    = run this command as the administrator (superuser)
# apt     = Ubuntu's package manager
# update  = refresh the list of available packages
# upgrade = actually install the newer versions
# -y      = answer "yes" to the confirmation question
That first sudo asks for your password, and shows nothing at all while you type it — no dots, no stars. That is deliberate, not a broken keyboard. Type it and press Enter.
Prove it works: your first five commands
Now the payoff. Type these one at a time — please do not paste them. Typing is how commands move from the screen into your fingers.
$ whoami                  # which user am I?
muh

$ pwd                     # print working directory - where am I?
/home/muh

$ uname -r                # which kernel version is running?
6.8.0-51-generic

$ cat /etc/os-release     # which distro is this?
PRETTY_NAME="Ubuntu 24.04.2 LTS"
NAME="Ubuntu"
VERSION_ID="24.04"

$ df -h /                 # how much disk space is left? (-h = human readable)
Filesystem      Size  Used Avail Use% Mounted on
/dev/sda1        29G  2.1G   26G   8% /
Five commands, and you have already answered the four questions you will ask on every unfamiliar server: who am I, where am I, what is this machine, and is the disk full. That last one is genuinely among the most-typed commands in production, because a full disk breaks applications in confusing ways — long before anything says "disk full".
Your prompt is telling you things too. Read it once, carefully:
muh@devops:~$
 │     │    │ │
 │     │    │ └─ $ means normal user   (# would mean you are root)
 │     │    └─── ~ is your home directory (/home/muh)
 │     └──────── the machine's name (its hostname)
 └────────────── the user you are logged in as
That one line answers "who am I, on which machine, in which folder" before you type anything. Once you are managing several servers, reading the prompt is what stops you running the right command on the wrong box.
Every Linux command has the same shape
There are thousands of Linux commands and you will never memorise them all. You do not need to. Almost every one follows the same pattern:
command  [options]  [arguments]
   ls        -la       /var/log
   │          │            │
   │          │            └─ what to act on (a file, folder, user, service)
   │          └────────────── how to behave (flags, starting with - or --)
   └───────────────────────── the program you are running
So ls -la /var/log reads as: list (ls) everything including hidden files, in long detailed form (-la), inside the folder /var/log. Options come either as short flags like -l, which can be bundled together as -la, or as long flags like --all, which are easier to read months later in a script.
And when you cannot remember a command's options, you ask the command itself. This is the skill that replaces memorising:
$ ls --help      # a short summary, printed straight into the terminal
$ man ls         # the full manual page - press q to quit, / to search
$ history        # every command you have typed
$ clear          # clean up the screen (Ctrl+L does the same thing)
Two habits to start today. Press Tab to complete file names and commands instead of typing them in full — it is faster and it kills typos. And press Ctrl+C to stop a command that is running or hanging; it is your escape hatch, and it is safe to use.
The rest of the course: 5 modules, 18 lessons
Here is where we are going, in order. Each module ends with something you can genuinely do on a real server:
- →Module 1 — Linux Basics (lessons 1–4): the file system, working with files, and text processing with grep, sed, awk and cut. After it you can navigate any server and shape its output.
- →Module 2 — Linux Administration (lessons 5–9): users and groups, permissions, processes, services and logs with systemd and journalctl, and package management. After it you can run and repair a server.
- →Module 3 — Networking (lessons 10–12): how Linux sees the network, troubleshooting with ping, dig, ss and curl, and SSH with keys. After it you can answer the question every incident starts with: why can this box not reach that one?
- →Module 4 — Bash Scripting (lessons 13–15): variables, conditions, loops, functions, and real automation scripts on a schedule with cron. After it you stop repeating yourself by hand.
- →Module 5 — Linux for DevOps (lessons 16–18): how Linux shows up inside Docker and Kubernetes, production tasks like log rotation and resource limits, and a capstone where you deploy and harden a real production server.
Three things to keep open as you work through it: the video course on YouTube (youtube.com/@devopsbymuh), the notes and commands for every lesson at devopsbymuh.com/learn/linux, and the code at github.com/codewithmuh/linux-course. And if you cannot install anything right now — locked-down work laptop, or you are reading this on your phone — there is a Linux terminal that runs in your browser at devopsbymuh.com/tools/linux-playground. It is a real Linux system, so the whole of module 1 works there with nothing to install.
How to actually learn this
Watching Linux content is pleasant and teaches you almost nothing. What works is small and a bit boring:
- →Type every command yourself, in your own terminal. Copy-paste trains your clipboard, not you.
- →Break things on purpose. Delete a config file, fill the disk, kill a service — then fix it. A VM you can delete is the safest classroom you will ever get.
- →Thirty minutes a day beats six hours on Sunday. These are motor skills; they need repetition, not marathons.
- →Read the error before you search for it. Linux errors are short and literal — "Permission denied" and "No such file or directory" mean exactly what they say.
- →Keep your own notes file. One commands.md where you write, in your own words, what each new command does. This single habit separates people who remember Linux from people who re-learn it every six months.
What's next
You now have a real Linux machine, you know what a kernel, a distro and a shell each are, and you can ask a system who and where you are. That is exactly the ground you needed before anything else in DevOps — because every tool in the rest of the roadmap is a program running on the machine you just built.
- →Linux is the platform under all DevOps work — the servers, the containers, the CI runners, the clusters.
- →The kernel is Linux; a distro is the kernel plus tools; the shell is the thing you type into.
- →Ubuntu LTS is the right distro to learn first, and moving to the Red Hat family later is mostly a different package manager.
- →Windows: wsl --install -d Ubuntu. Mac: brew install --cask multipass, then multipass launch. Both free, both undoable.
- →Every command is command, then options, then arguments — and --help and man are always one keystroke away.
Part 2 is a short one: what Linux actually is under the marketing, why every cloud VM, container and CI runner turns out to be a Linux box, and how you reach a server with ssh. Then part 3 is the map of a Linux system — what really lives in /etc, /var, /home and /usr, and how to move around all of it without a mouse. Bring the terminal you just installed, and I will see you there.
$ ./work-with-me.sh
Want this in your job, not just your notes?
I take engineers from wherever they are to hired-in-6-months — real projects, code reviews, and mock interviews. Or if you just need a hand shipping something to production, let's work together.
or subscribe on YouTube — free, forever.
$ subscribe --new-articles
Get new articles in your inbox
One email when a new hands-on guide goes live — Kubernetes, AWS, CI/CD, MLOps. No spam, unsubscribe anytime.