Users and Groups in Linux: root, sudo, useradd and usermod
Part 6 of the free Linux for DevOps course: why you should never log in as root, why every user is really a number, how to create a user with useradd, set its password with passwd, add it to groups with usermod -aG, read the user database in /etc/passwd and /etc/group, and run a command as anyone with sudo -u.
Module one is done. Across the first five parts you installed Linux, learned the file system, made and searched files, and in part five you turned two hundred thousand log lines into one answer. This lesson opens module two — Linux Administration — where the question changes from "how do I use this machine?" to "how do I run this machine for other people?". The module covers users and groups, permissions, processes, services and logs, and package management, in that order, because each one leans on the one before it.
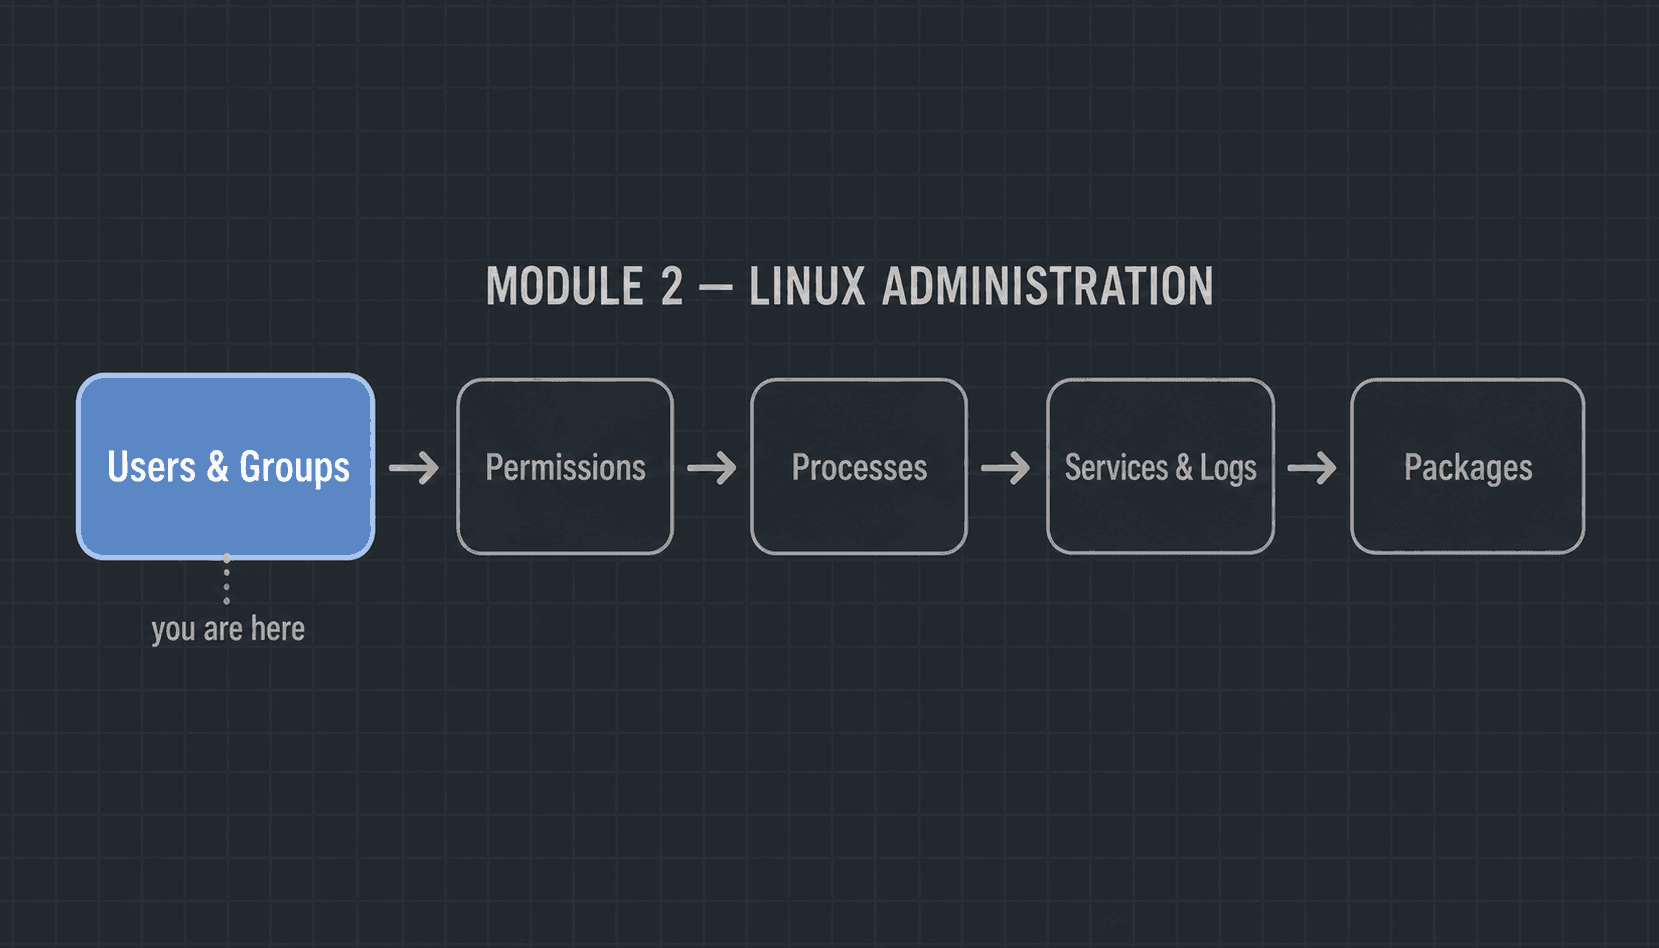
This is part six of the free Linux for DevOps course, and the written companion to the sixth video. It is the foundation lesson: every "permission denied" you will ever debug, every deploy key, every "why can't the app write to this folder?" traces back to what you learn here — who exists on a machine, and which groups they belong to.
Somewhere to practise
Same as every lesson: open the browser terminal at devopsbymuh.com/tools/linux-playground — nothing to install and every command here runs in it — or use the Ubuntu machine you set up in part one. Reading this without typing it teaches you very little, so have a terminal open before you scroll further.
Every user is a number
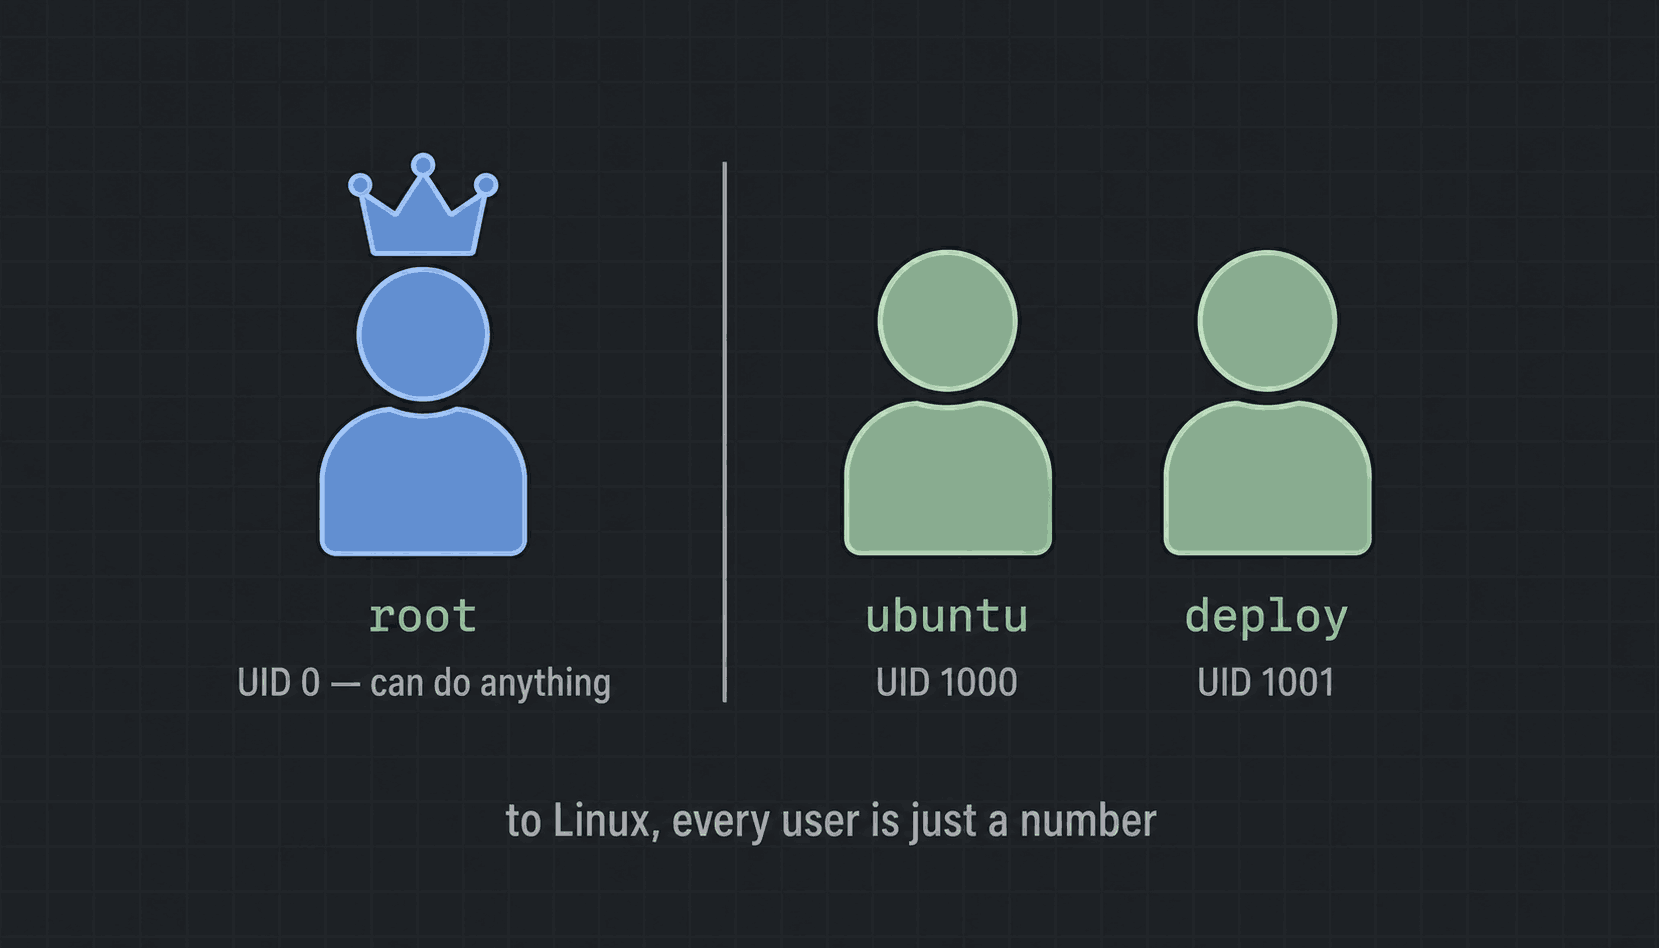
Here is the whole concept in three sentences. Every Linux system has one root super user that can do anything. Everyone else is a regular user with a numeric user ID — a UID. And users belong to groups, each with a group ID — a GID — which is how Linux gives several people shared access to something without handing any of them root.
See it on your own machine. Three commands, no flags:
id        # your UID, GID and every group you are in
whoami    # just your username
groups    # just your groups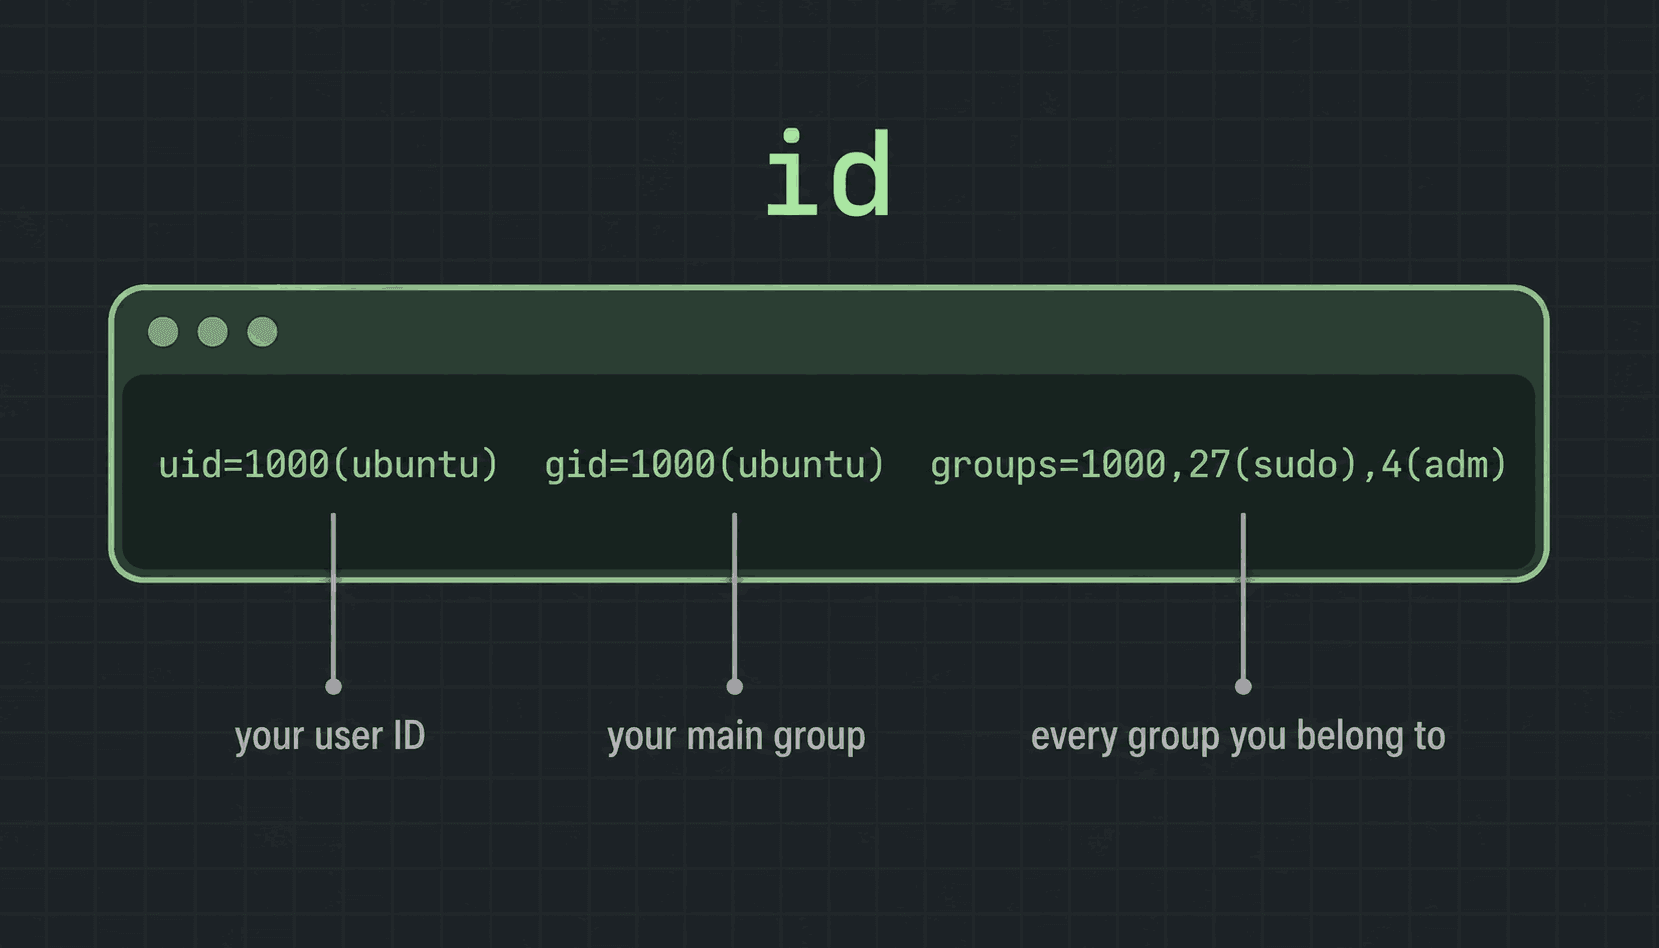
On a fresh Ubuntu server that prints uid=1000(ubuntu) — the first regular user always gets 1000, because the numbers below it are reserved for the system. The gid is your main group, and the groups list is the interesting part: the ubuntu user is in sudo, adm, dip and a few more. That sudo membership is exactly why the ubuntu user is allowed to borrow root powers — which brings us to the rule this whole lesson exists to teach.
The golden rule: never be root
root has UID 0 and no limits. It can read every file, kill every process, and delete the entire operating system without a single confirmation prompt. That power is sometimes necessary and always dangerous — logged in as root, one mistyped command can wipe the machine. So the golden rule of Linux administration is least privilege: log in as a normal user, and borrow root's power only for the one command that needs it.
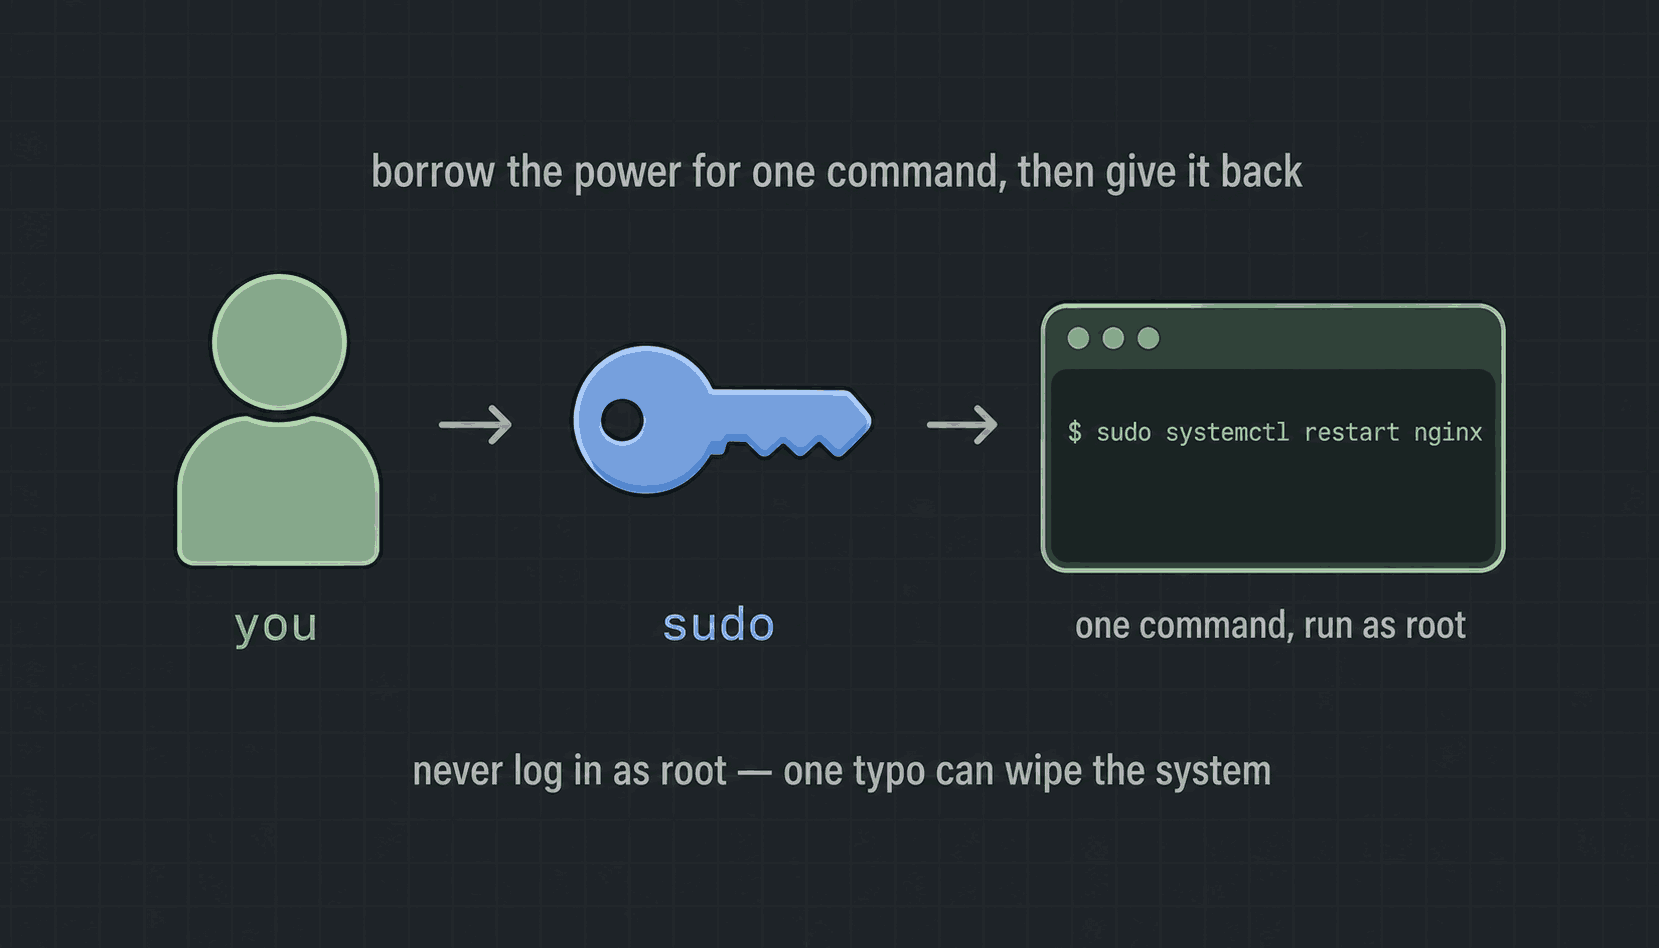
That borrowing is what sudo does. Put it in front of any command and that one command runs as root; the moment it finishes, you are your normal self again. It only works if your user is in the sudo group — which is the machine's short list of people trusted with root power, and you will read that exact list off disk later in this lesson.
Creating a user
Time to create a second user. We will call it deploy — not a random choice: real servers almost always have a deploy user that CI pipelines log in as, so this is practice for something you will genuinely build later. Two commands:
sudo useradd -m -s /bin/bash deploy
sudo passwd deploy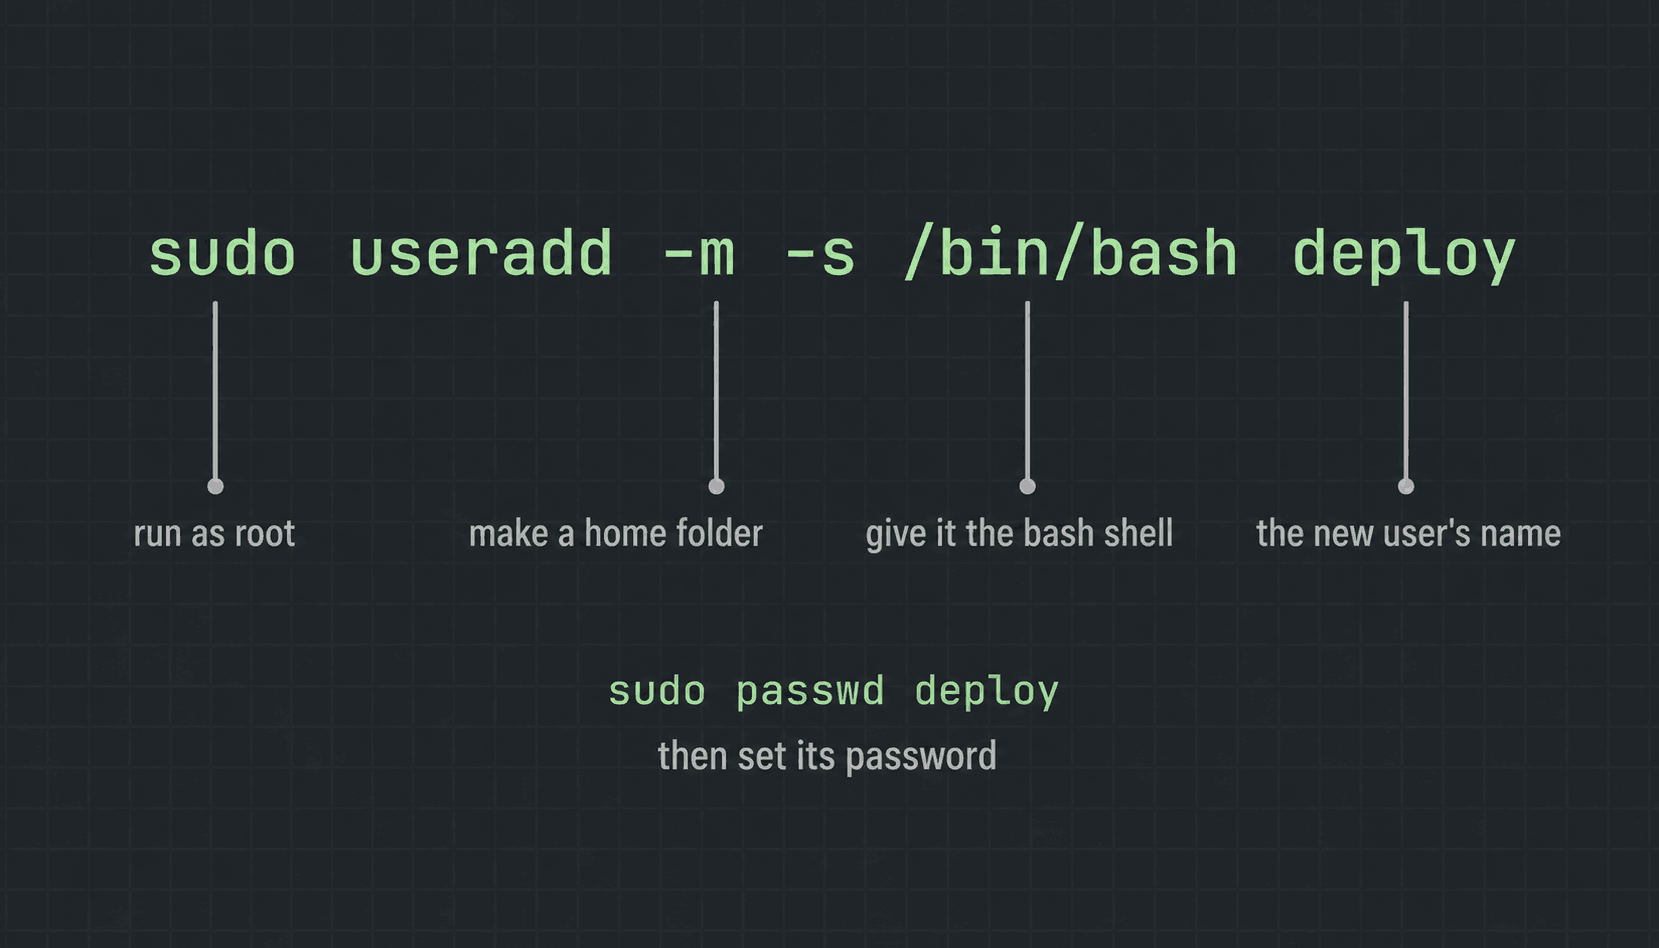
Every flag earns its place. -m makes the home folder, /home/deploy — leave it off and Ubuntu creates the user with no home at all, which causes confusing errors later. -s /bin/bash sets the login shell, so the new user gets the same bash you have been using all course. And the passwd command on the second line sets the account's password — it asks twice, and like every password prompt in Linux, the screen shows nothing while you type. That is normal; keep typing.
You may also meet adduser, a friendlier interactive wrapper that asks you questions. It is fine, but it is not installed everywhere — useradd is the one that works on every Linux you will ever SSH into, which is why the course teaches it.
Becoming the new user
Does the new account actually work? Switch into it and look around:
sudo su - deploy
whoami     # deploy
groups     # deploy — and nothing else
exit       # back to ubuntu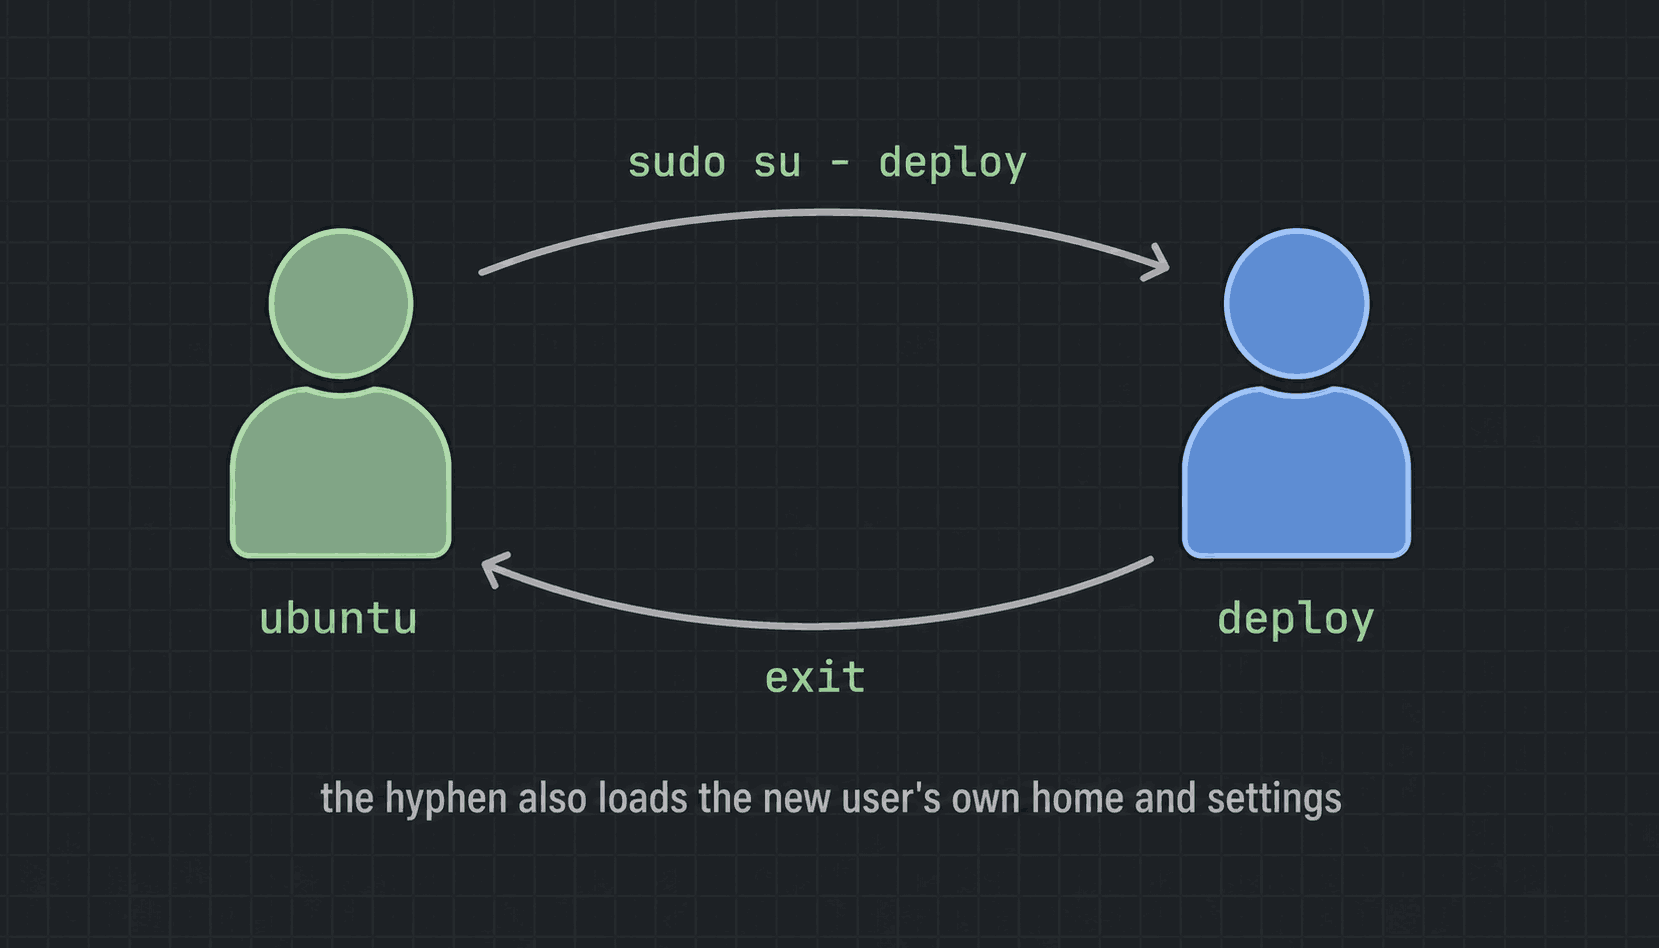
The hyphen in su - deploy matters more than it looks: it gives you a full login as deploy — deploy's home folder, deploy's settings — instead of dragging your old environment along. In the video I switch without the hyphen and it mostly works, but the hyphen is the habit worth building.
Now look at what groups printed: just deploy. Every new user gets a personal group with its own name, and that is all. No sudo. The new user is powerless by design — and that sets up the most instructive failure in this whole course.
The failure that teaches the lesson
In the video, still logged in as deploy, I try to add deploy to the sudo group — and the system refuses. Stop and enjoy that refusal, because it is the whole security model in one moment: a user cannot give itself more power. If it could, every user would be root and none of this lesson would mean anything.
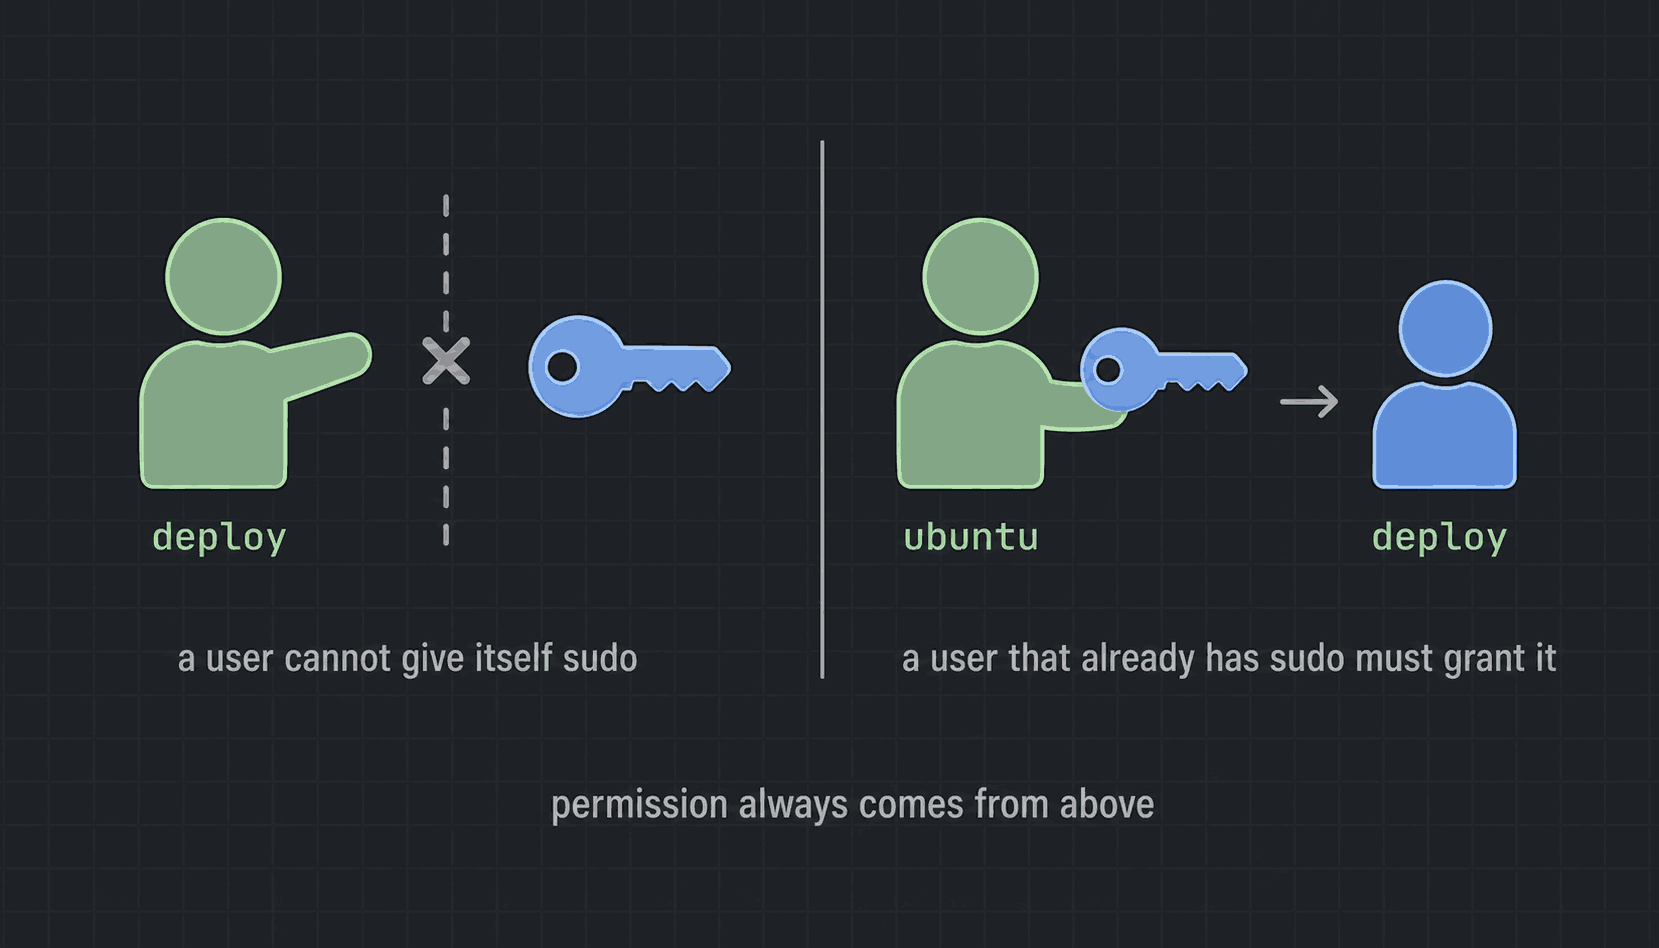
Permission always comes from above: only root, or a user already trusted with sudo, can raise someone else. So type exit, land back in the ubuntu account — which is on the trusted list — and grant the power properly.
usermod: adding a user to a group
sudo usermod -aG sudo deploy
id deploy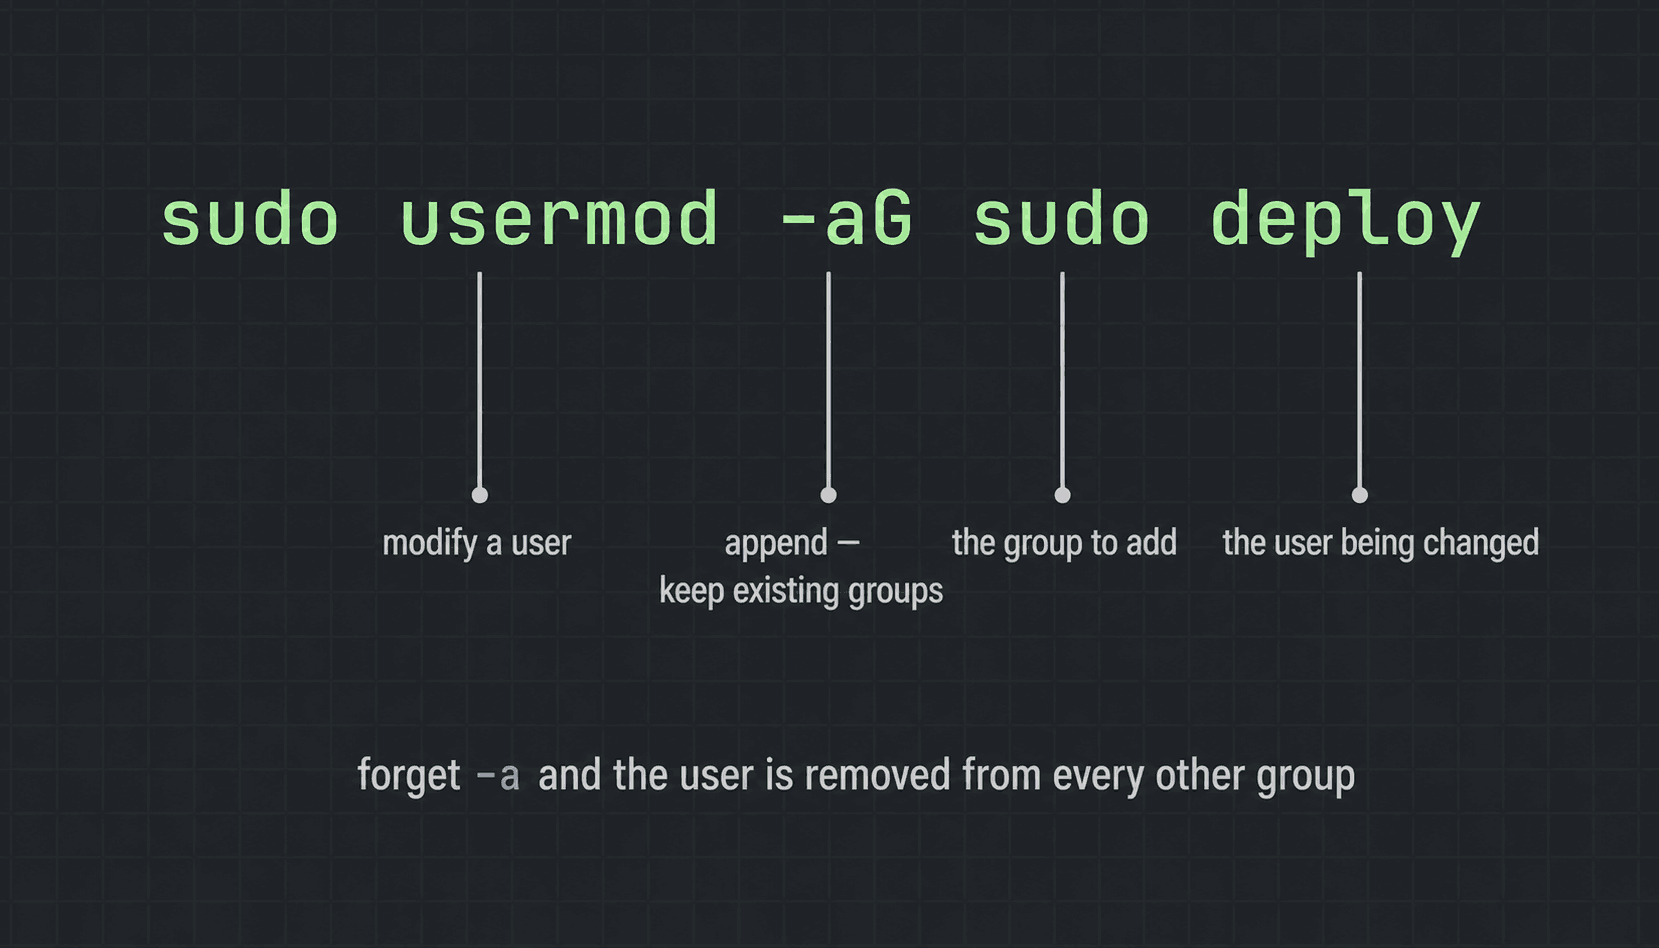
usermod modifies an existing user, -G names the group, and -a means append — add this group, keep the old ones. That little -a is the most important character in the lesson: run usermod -G sudo deploy without it and you have not added a group, you have replaced the entire list, silently kicking the user out of every other group it was in. On a real server that mistake locks people out of things mid-afternoon. Always -aG, as one habit.
Then id deploy confirms it: deploy now shows a second group, 27(sudo). The 27 is nothing mysterious — it is simply the sudo group's GID on Ubuntu, the same kind of number that 1000 is for your own group. And one gotcha the video skips past: group membership is read at login. If deploy had still been logged in somewhere, that session would keep saying no sudo until deploy logged out and back in. When usermod "doesn't work" for someone, this is why, almost every time.
Where Linux keeps its users
Here is the part I love showing beginners: there is no hidden database. Users and groups live in two plain text files, and the grep you learned in this course reads them directly:
grep deploy /etc/passwd
grep sudo /etc/group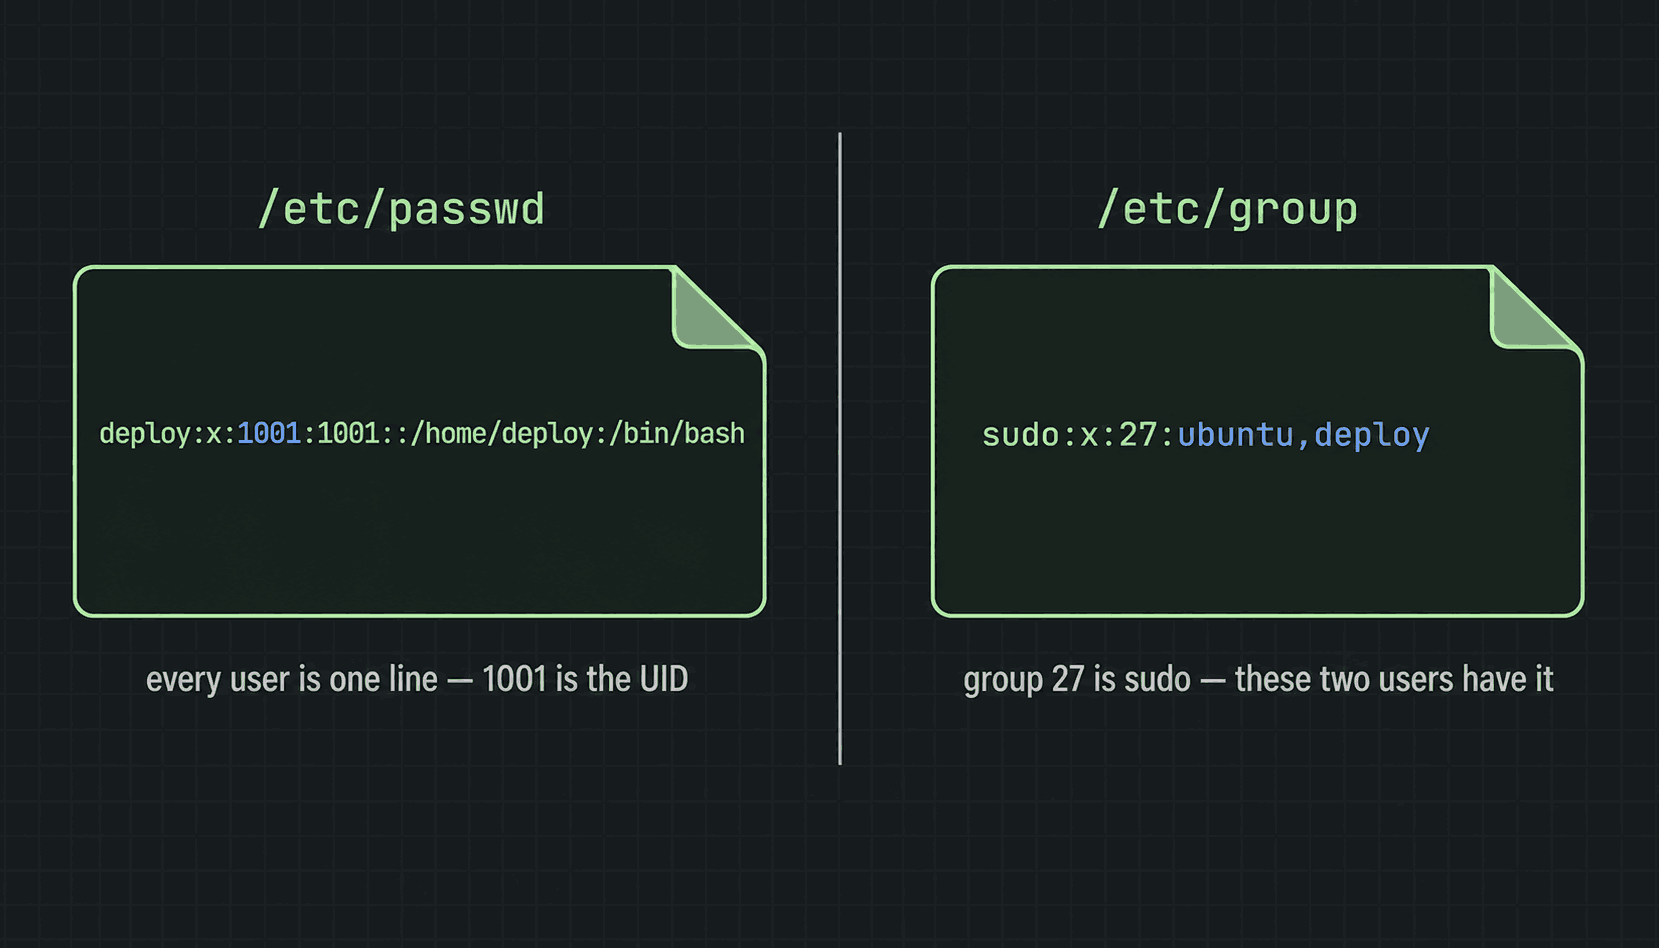
The passwd line reads deploy:x:1001:1001::/home/deploy:/bin/bash — name, then an x (the real password hash lives in a separate protected file, /etc/shadow), then the UID. ubuntu was 1000, so deploy got 1001; the numbers just count up. Then the home folder and shell you chose with -m and -s, written down exactly where you would expect.
The group line is the one you will use at work: sudo:x:27:ubuntu,deploy. That is the complete list of users on this machine with root power, one grep away. When you join a team and inherit a production server, this is one of the first commands worth running — who can sudo here? Now you know exactly where the answer lives.
Running a command as someone else
One last trick, and it is the one the practice task needs. The same command, three ways:
whoami                  # ubuntu
sudo whoami             # root
sudo -u deploy whoami   # deploy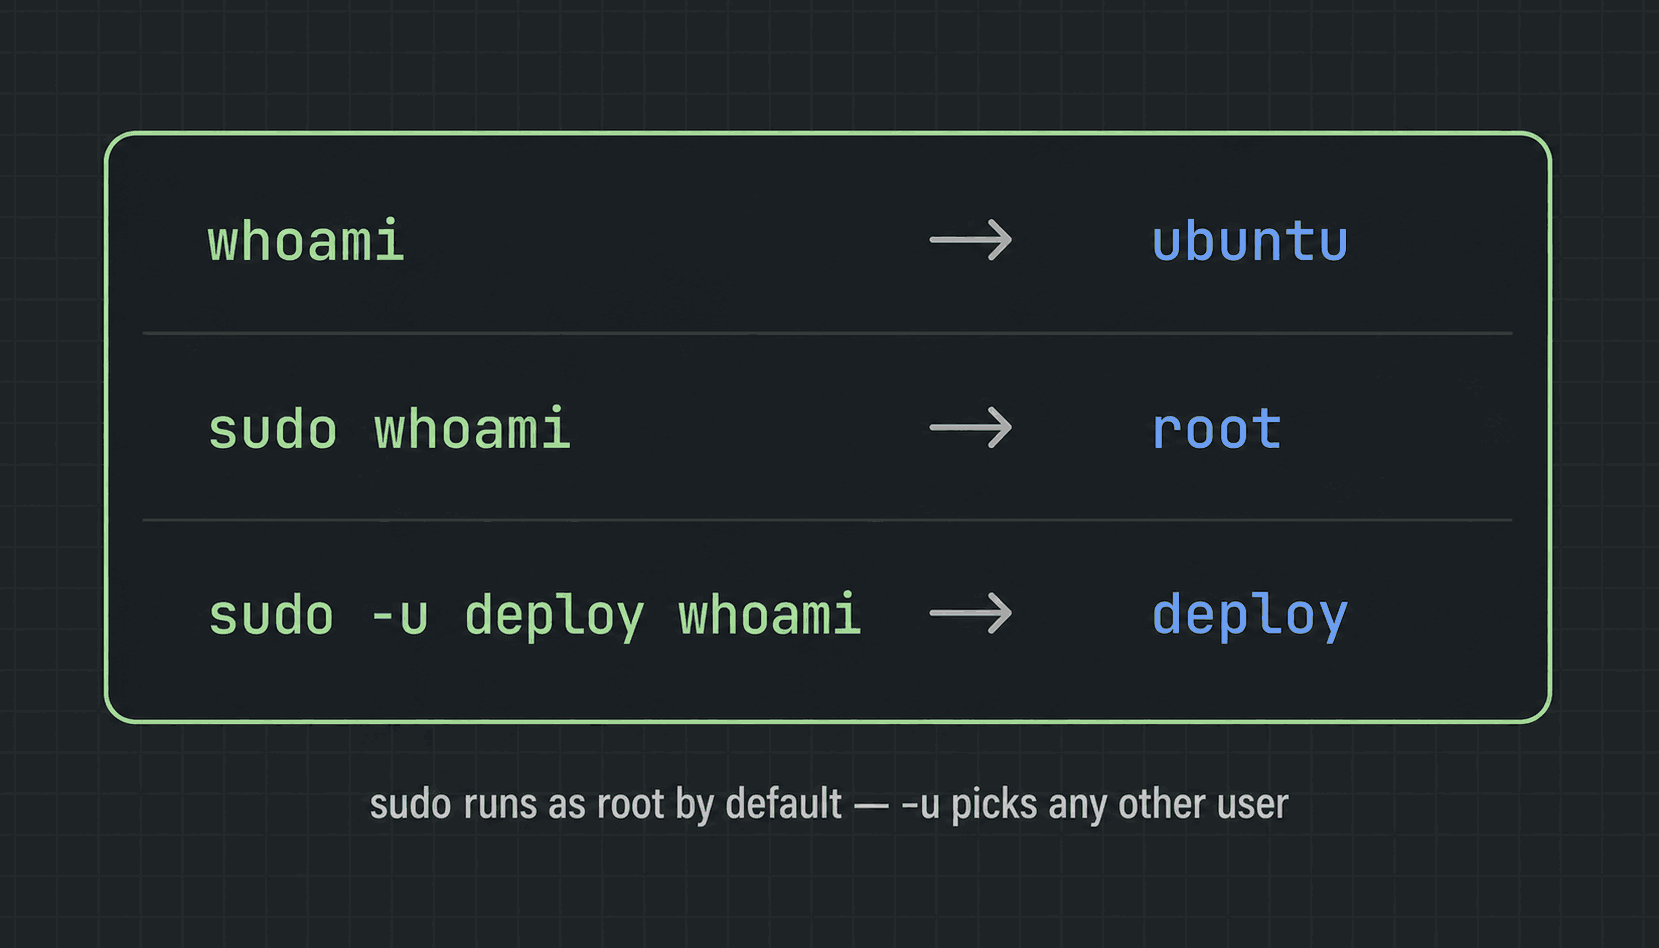
Three answers: ubuntu, root, deploy. That middle line is worth a pause — sudo whoami prints root, because sudo runs the command as root unless you say otherwise. The -u flag is the "say otherwise": sudo -u deploy runs one command as deploy without switching into the account at all. That is how you test "can the deploy user actually read this file?" without logging out, and it is how services get run as their own low-power users — which will matter a lot in the services lesson later this module.
Practise this properly
Here is the homework from the video: create an app user, add it to a new webadmins group, confirm the membership, and run a command as that user. One new command appears — groupadd, which creates an empty group — and everything else you now know:
# create the user, with a home folder and bash
sudo useradd -m -s /bin/bash app
sudo passwd app

# create a brand-new group — groupadd is the one new command here
sudo groupadd webadmins

# add the user to it (-aG, always together)
sudo usermod -aG webadmins app

# confirm the membership
id app

# run a command as that user without logging in as it
sudo -u app whoami

# bonus: read both answers straight from the database
grep app /etc/passwd
grep webadmins /etc/group
If id app shows webadmins and sudo -u app whoami prints app, you have done, in five minutes, the exact sequence a DevOps engineer runs when a new teammate or a new service needs access to a server.
Every command in this lesson is written out in the course repo at github.com/codewithmuh/linux-course, so you can work through the list without scrubbing back through the video. The same notes are at devopsbymuh.com/learn/linux.
What's next
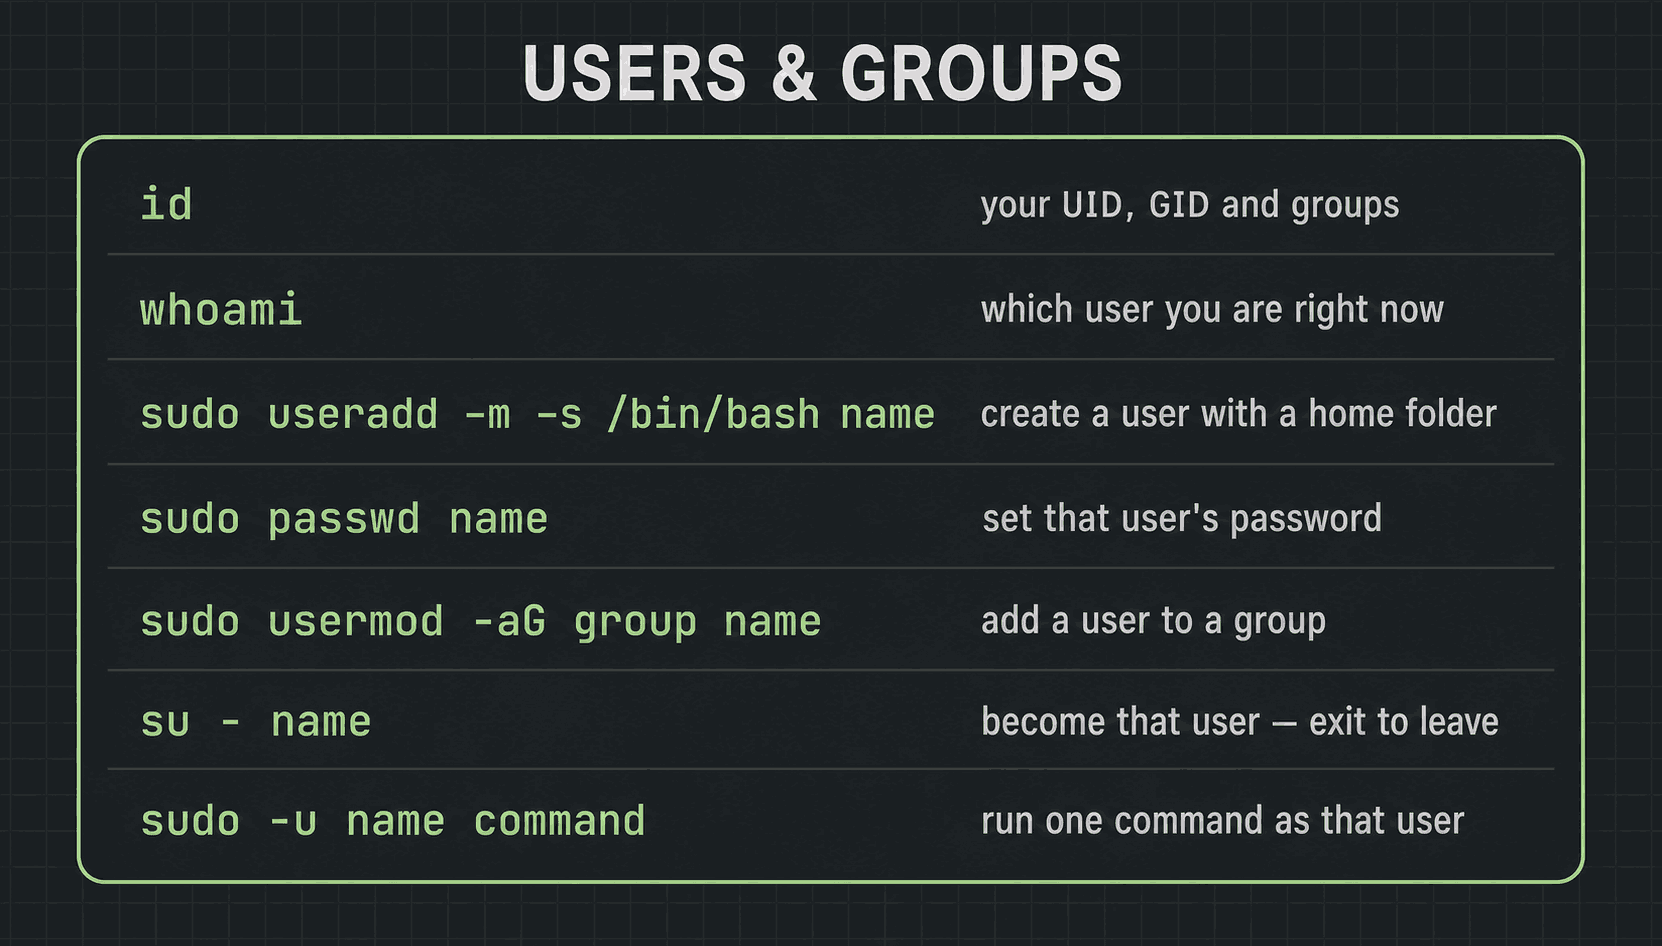
You can now explain who root is and why you avoid being root, create a user, password it, group it, audit the whole machine's access from two text files, and act as any user for a single command. Here is the whole lesson in six:
- →Every user is a number — root is UID 0 and unlimited, regular users start at 1000, and groups (GIDs) are how people share access without sharing root.
- →The golden rule is least privilege: log in as a normal user and borrow root per-command with sudo. Never log in as root.
- →sudo useradd -m -s /bin/bash name creates a user with a home folder and bash; sudo passwd name gives it a password.
- →A user cannot promote itself — sudo usermod -aG sudo name must come from a user that already has the power. Never forget the -a, and remember new groups apply on next login.
- →There is no hidden database: users live in /etc/passwd, groups in /etc/group, and grep reads both. grep sudo /etc/group is your who-can-root audit.
- →sudo runs commands as root by default; sudo -u name runs one command as anyone else.
Now the machine has users — the obvious next question is what each of them is allowed to touch. Part seven is Linux permissions: the rwx letters you have been ignoring in ls -l all course, who owns every file, and chmod and chown, the commands that change it. Users and permissions together are most of Linux security, and you are now halfway there. See you in the next one.
$ ./work-with-me.sh
Want this in your job, not just your notes?
I take engineers from wherever they are to hired-in-6-months — real projects, code reviews, and mock interviews. Or if you just need a hand shipping something to production, let's work together.
or subscribe on YouTube — free, forever.
$ subscribe --new-articles
Get new articles in your inbox
One email when a new hands-on guide goes live — Kubernetes, AWS, CI/CD, MLOps. No spam, unsubscribe anytime.