Working with Files in Linux: cat, nano, head, tail, grep and Redirection
Part 4 of the free Linux for DevOps course: create a file with touch, edit it in nano and actually get back out, print it with cat, read just the top or bottom with head and tail, add lines with >>, and find the one line that matters with grep.
In part three you learned to move around a Linux system — where things live, and how to walk the tree without a mouse. That gets you to the file. This lesson is about the file itself: making one, writing in it, reading it back, and finding the single line you care about inside a file with two hundred thousand lines in it.
This is part four of the free Linux for DevOps course, and the written companion to the fourth video. Six commands do almost all of this work, and you will use every one of them on your first day in a real job. There is no theory to get through first. Open a terminal and type along.
Somewhere to practise
You need a Linux machine. Any of these three is fine, and none of them is better than the others for this lesson:
- →The browser terminal at devopsbymuh.com/tools/linux-playground. Nothing to install, nothing to pay for, works on a locked-down work laptop and on your phone. Every command in this lesson runs there.
- →The Ubuntu machine you installed in part one, with WSL on Windows or Multipass on a Mac.
- →A real server in the cloud. This is what the video uses, and it is worth doing once — but do it because you want the practice, not because the file commands need it.
If you are on a Mac, one warning before you start: the Terminal app on macOS is not Linux. It is close enough that most of this lesson works, but some commands behave differently, and later lessons will drift further apart. Use the playground or a real Linux machine and you will never have to wonder whether a difference is your mistake or the operating system's.
Connecting to a real server with ssh
You can skip this whole section and lose nothing — the file commands start in the next one. But connecting to a machine that is not yours is the moment Linux stops being a tutorial, so here is the short version.
In the video I launch a t3.micro EC2 instance on AWS running Ubuntu, on the free tier. During setup AWS makes you create a key pair and download a .pem file. That file is your key. There is no password login — the key is the only way in, AWS will not give you a second copy, and losing it means rebuilding the server.
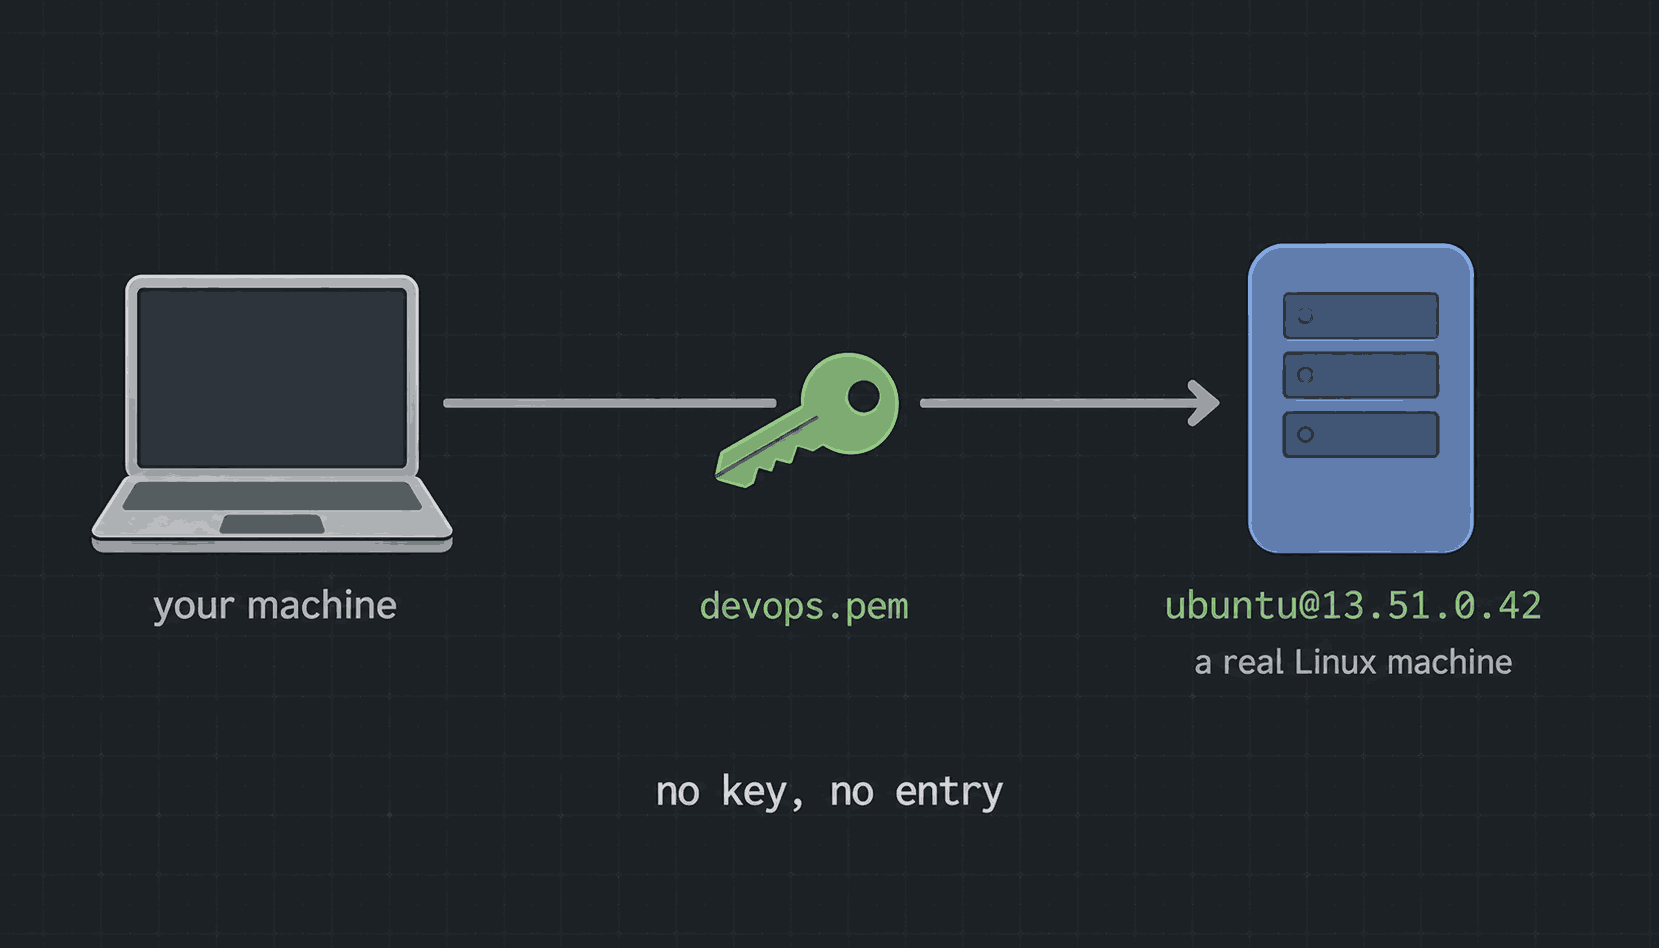
The connection command looks like this, and every part of it is doing a job:
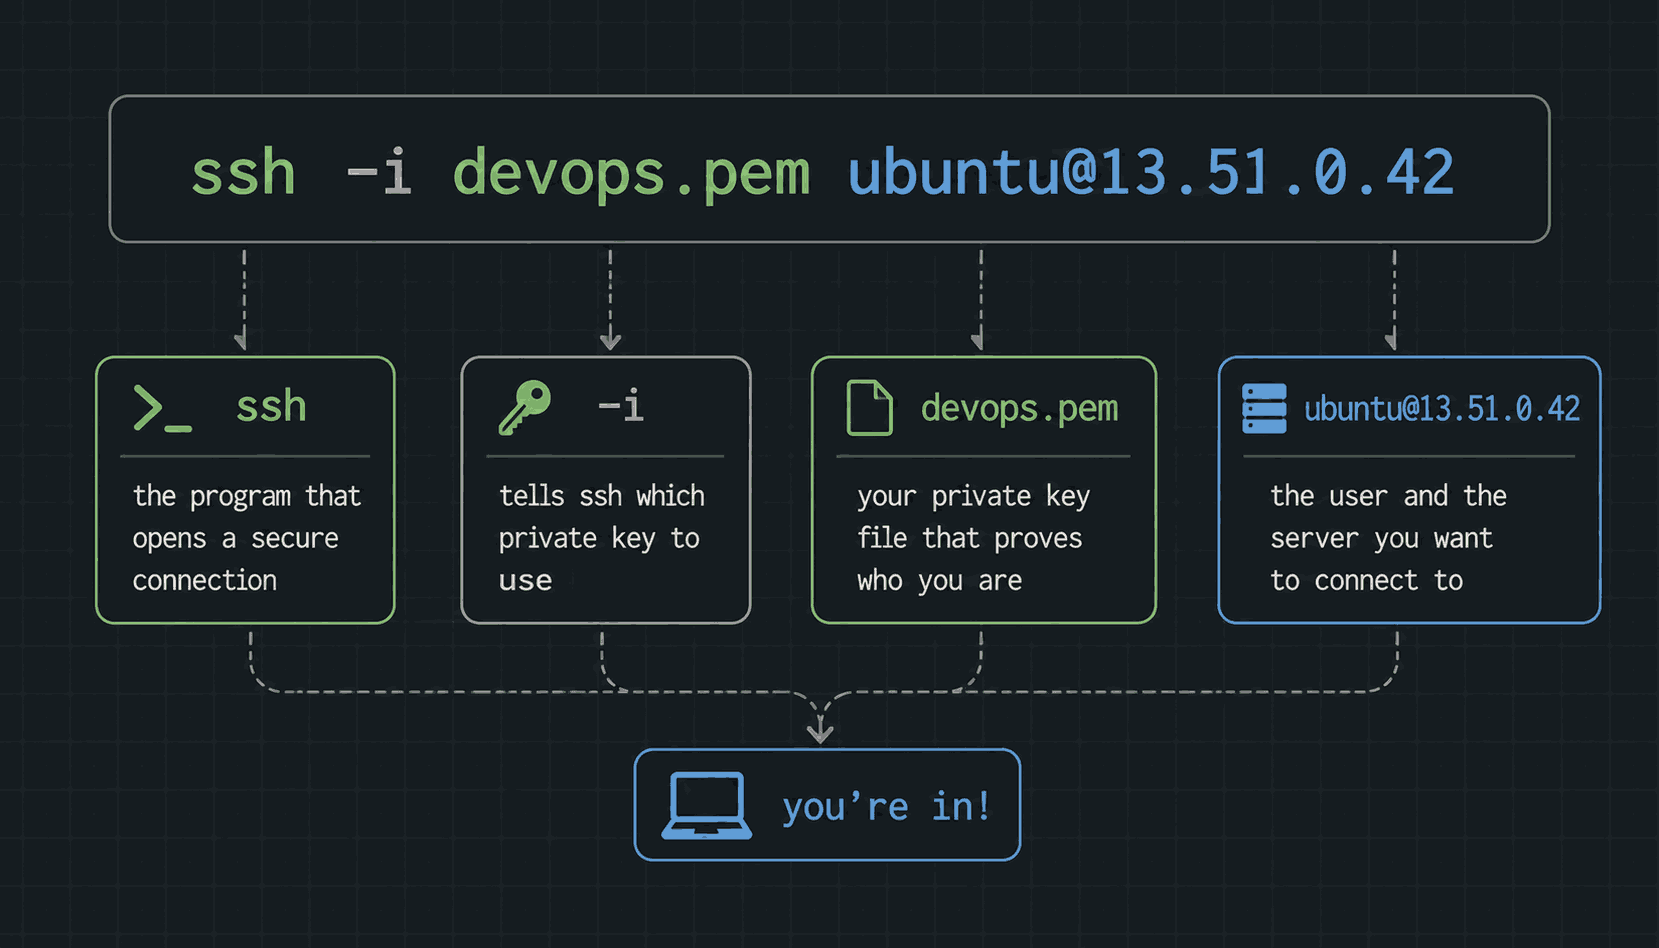
ssh -i devops.pem ubuntu@13.51.0.42- →ssh — connect to a remote machine over an encrypted link.
- →-i devops.pem — use this private key to prove who you are.
- →ubuntu — the username to log in as. On Ubuntu images it is ubuntu; on Amazon Linux it is ec2-user. Getting this wrong is the most common first failure.
- →13.51.0.42 — the server's public IP address, which AWS shows you on the instance page.
Two things trip up nearly everyone here. The first is where you are standing. The command names devops.pem with no path, so it only works if you are already in the folder holding that file. Your browser almost certainly put it in Downloads, so cd there first — this is exactly the navigation from part three, doing real work about ninety seconds after you learned it.
cd ~/Downloads
ssh -i devops.pem ubuntu@13.51.0.42
The second is permissions. SSH refuses to use a key that other people on the machine could read, and it refuses loudly, with an error about your key file being unprotected. The fix is one command, and it means make this file readable and writable by me and by nobody else:
chmod 400 devops.pemWe cover what 400 actually means in the permissions lesson later in this course. For now, run it when SSH complains and move on.
One last thing, and it is about money rather than Linux. A running EC2 instance bills by the hour whether you are using it or not, and the free tier has a limit. When you finish practising, go back to the AWS console and terminate the instance. Not stop — terminate. Set yourself a billing alert too. Every engineer has a story about the machine they forgot, and the cheapest way to hear that story is from someone else.
Making a file, and putting something in it
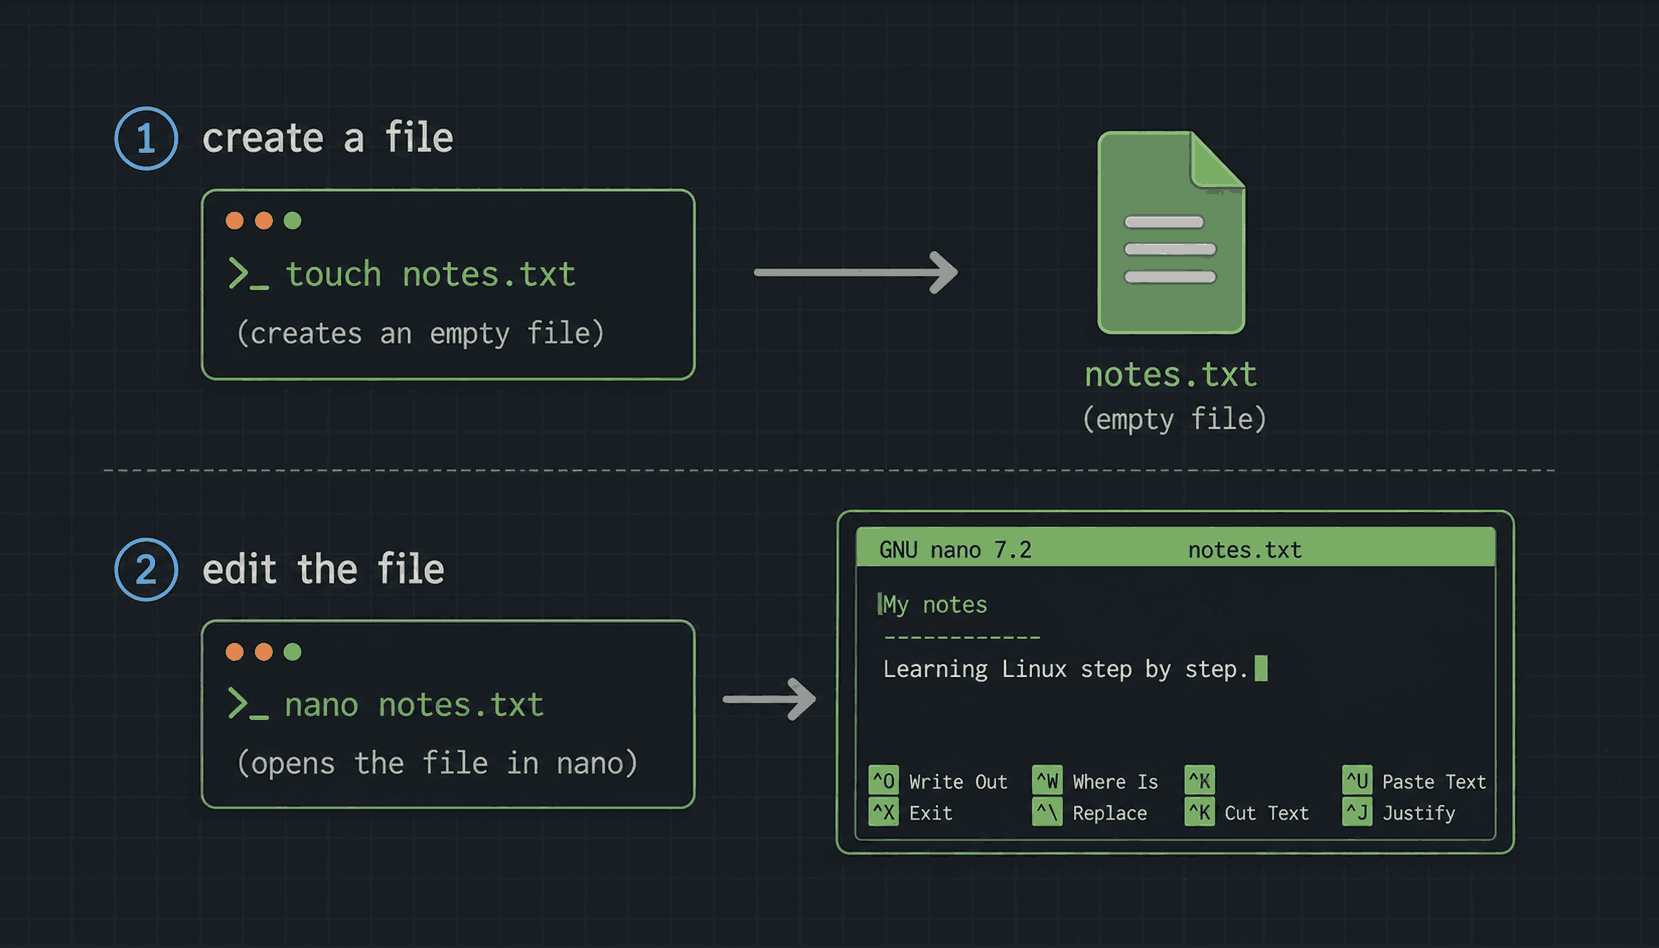
touch makes an empty file. That is all it does, and it is the fastest way to get one:
touch notes.txt
ls -l notes.txt
The file exists now, and it holds nothing. Zero bytes. To put words in it you need an editor, and the one that is already installed nearly everywhere is nano:
nano notes.txtYour terminal turns into an editor. Type normally — there is no insert mode to remember, no command to enter first. This is why nano is the right first editor even though vim gets all the attention: the arrow keys move the cursor, typing types, and that is the whole learning curve.
Type a few lines so you have something to work with for the rest of the lesson:
keep learning Linux
DevOps by Muh
I will be at the top in DevOps
keep learning
Getting back out of nano
Here is where everybody gets stuck, including me on camera. You have typed your lines, you want to save and leave, and there is no File menu and no close button that works. Clicking the X on the terminal window does not save your file — it throws away the terminal.
Look at the two rows along the bottom of the screen. Those are the shortcuts, and the caret symbol in front of each one means the Control key. So ^O is Control and O together, not caret-then-O. That single piece of notation is the only thing standing between most beginners and a saved file.
- →Control + O — write the file out, which means save. It then shows you the filename at the bottom; press Enter to confirm it.
- →Control + X — exit nano. If you have unsaved changes it asks Y or N first.
- →Control + K — cut the whole line the cursor is on.
- →Control + W — search inside the file for a word.
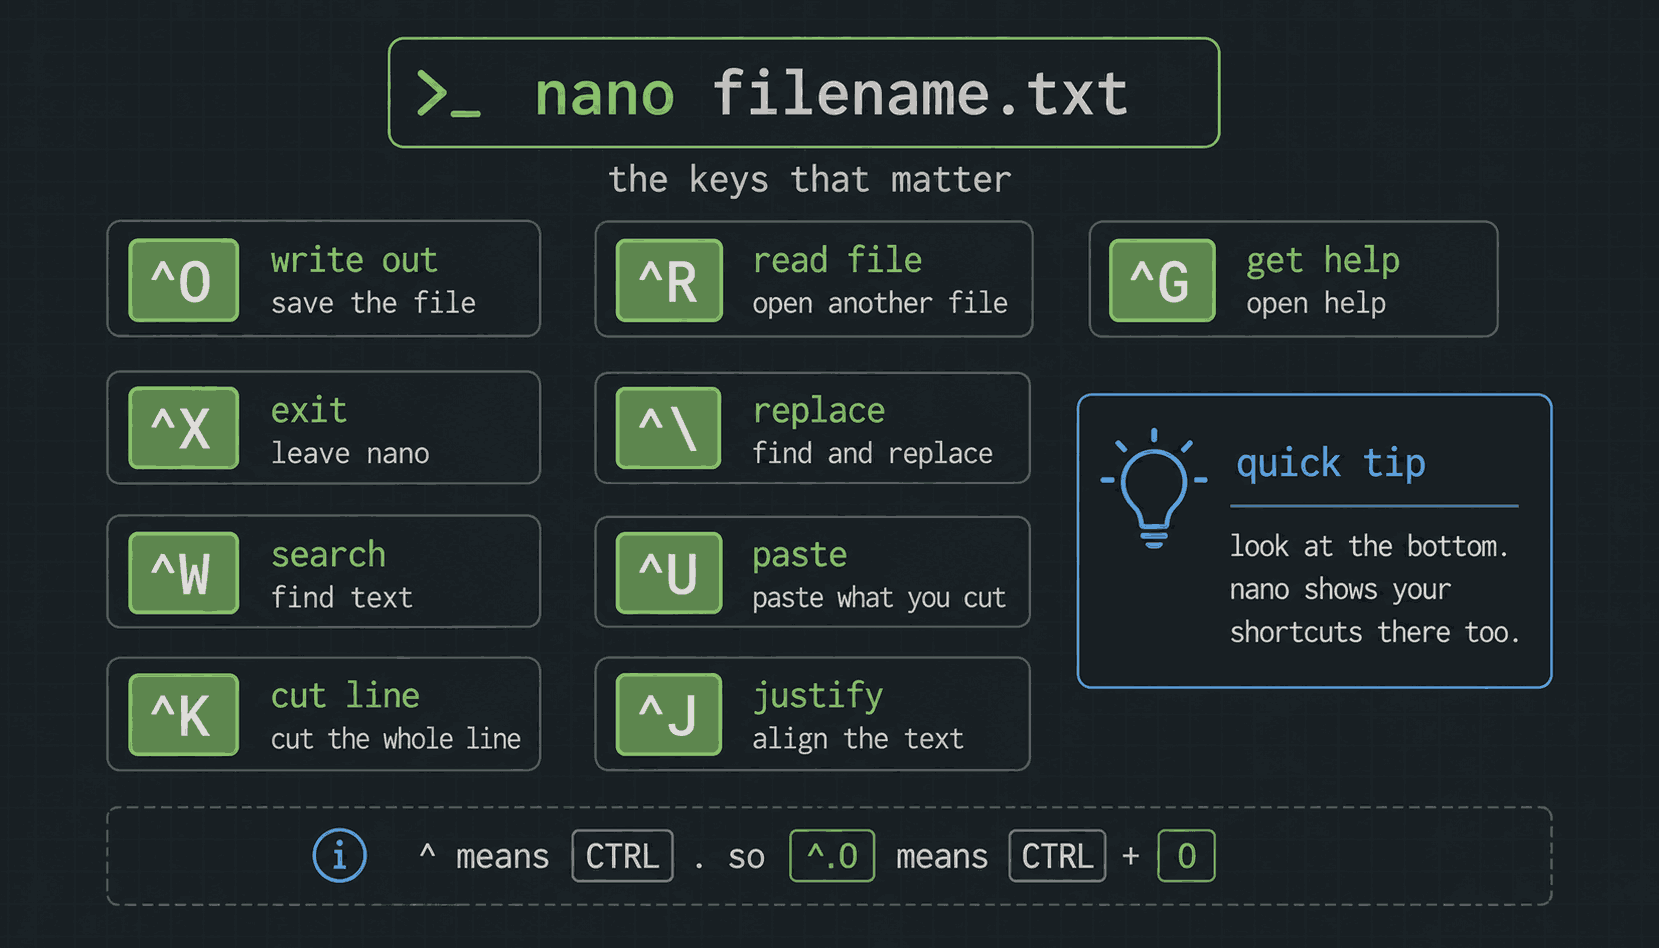
So the sequence to save and leave is: Control + O, then Enter, then Control + X. Do it three or four times now, on purpose, until your fingers know it. It is the difference between editing a config file on a production server calmly and editing it while quietly panicking.
And if you ever open vim by accident — which will happen, because some systems make it the default — the way out is to press Escape, then type a colon followed by q and an exclamation mark, then Enter. Quit without saving. That is not a joke command; it genuinely is the most searched-for thing about vim.
Reading a file with cat
cat prints a file to the screen. The name is short for concatenate, because it can also join several files together, but printing one file is what you will use it for ninety-nine times out of a hundred:
cat notes.txtYour four lines appear in the terminal, and you are back at the prompt straight away. No editor opens, nothing can be changed by accident. That last part matters more than it sounds: cat is the safe way to look at a config file when you only want to read it, because there is no way to modify anything.
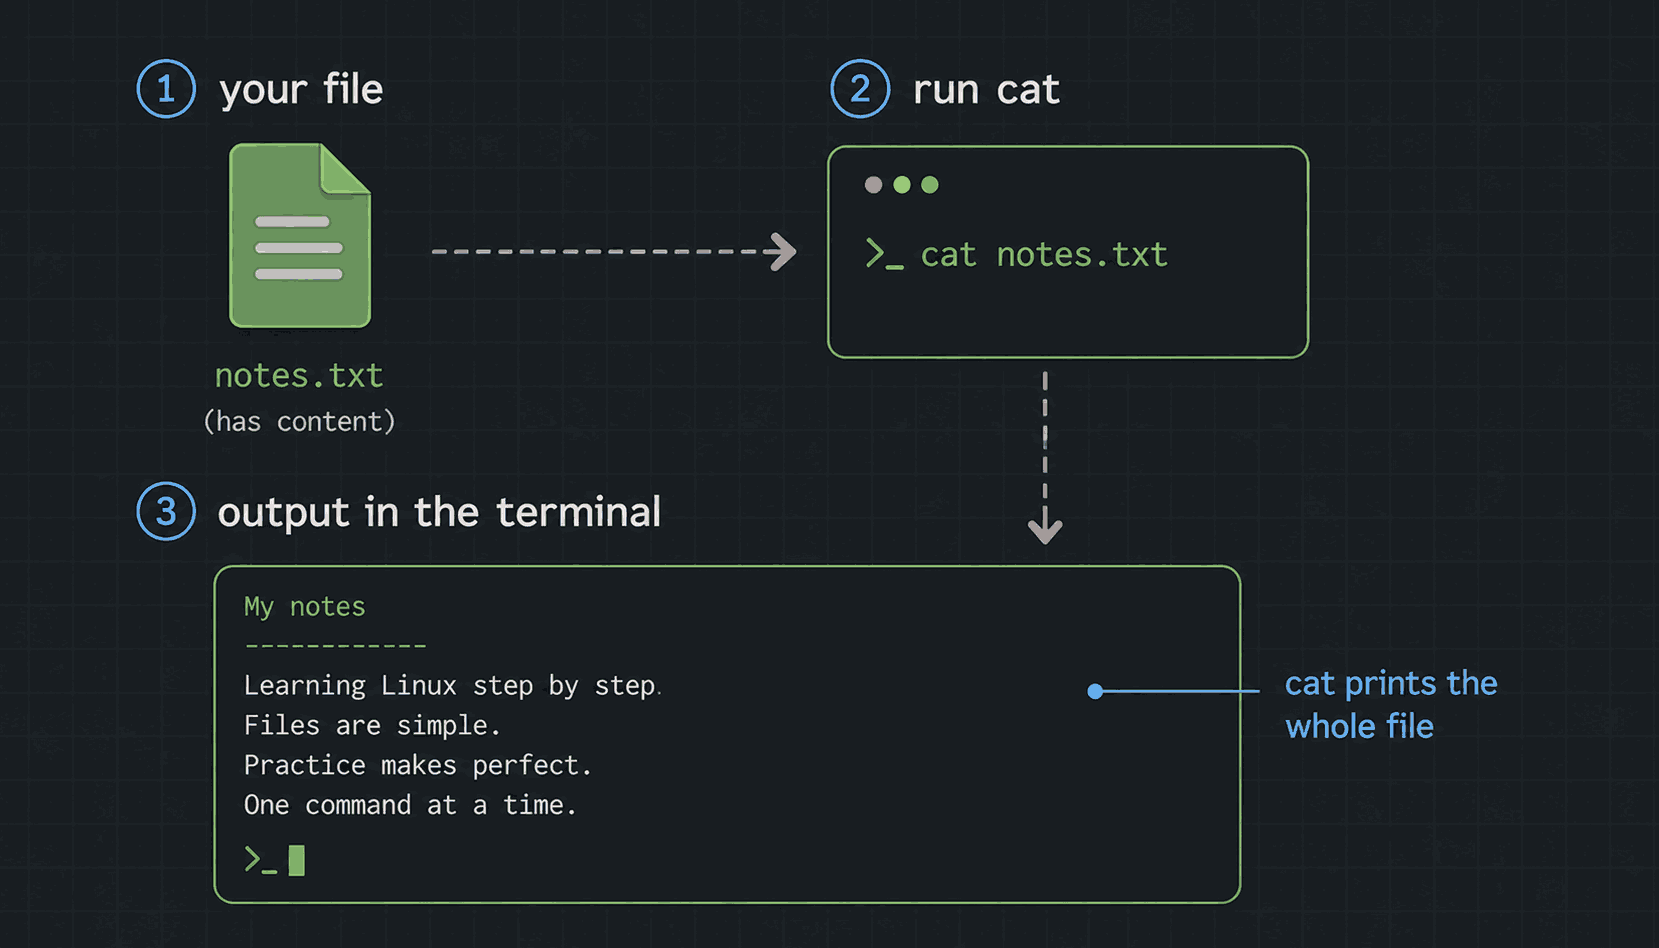
Now the catch. cat prints the whole file, always, with no way to stop partway. Run it on a log file with two hundred thousand lines and it will scroll past for a long time and leave you with the last screenful, having wasted a minute. For anything long, use less instead:
less /var/log/syslogless opens the file a page at a time. Space moves down a page, b moves back, slash searches for a word, and q quits. It never loads the whole file into memory, so it opens a two-gigabyte log instantly. A good habit to build early: cat for files you know are short, less for anything you are not sure about.
Just the part you need: head and tail
Most of the time you do not want the whole file. You want the newest lines, because something just broke. head and tail give you one end or the other:
head -n 5 notes.txt
tail -n 5 notes.txt
head shows the first five lines, tail shows the last five. The -n flag is how many lines you want, and if you leave it off both commands default to ten.
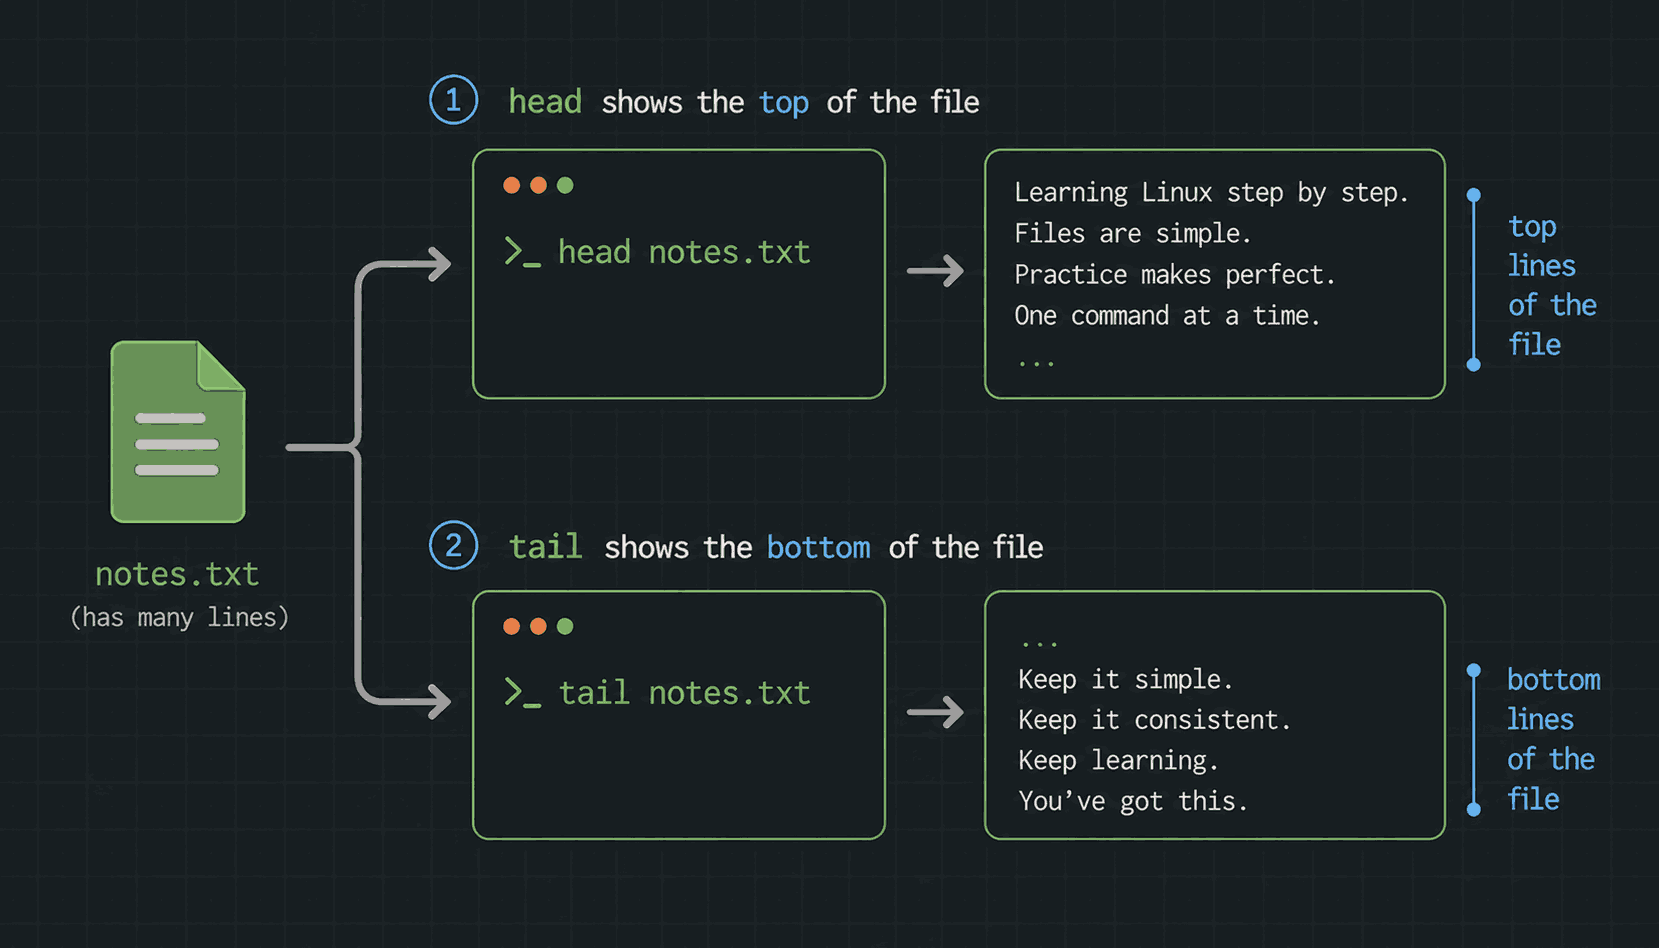
tail is the one you will reach for constantly, because log files are written in order — the newest line is always at the bottom. When someone says the site is down, tail is very often the first command anyone types.
And it has one flag that changes how it feels entirely:
tail -f /var/log/syslog-f means follow. The command does not finish — it sits there, and every new line written to that file appears on your screen the moment it is written. Leave it running in one terminal, then use the application in another, and you watch your own actions produce log lines in real time. Nothing teaches you what an application actually does faster than that. Press Control + C to stop it.
Writing to a file from the command line
You do not always need an editor. echo prints text, in the same way print does in Python:
echo "deploy done"On its own that just prints to the screen. The useful part is redirecting it into a file instead, and there are two ways to do that. They look almost identical and they do very different things:
echo "deploy done" > deploy.log
echo "deploy done" >> deploy.log
One arrow overwrites. It empties the file completely and writes your line as the only thing in it. Two arrows append — your line is added to the end and everything already there is kept.
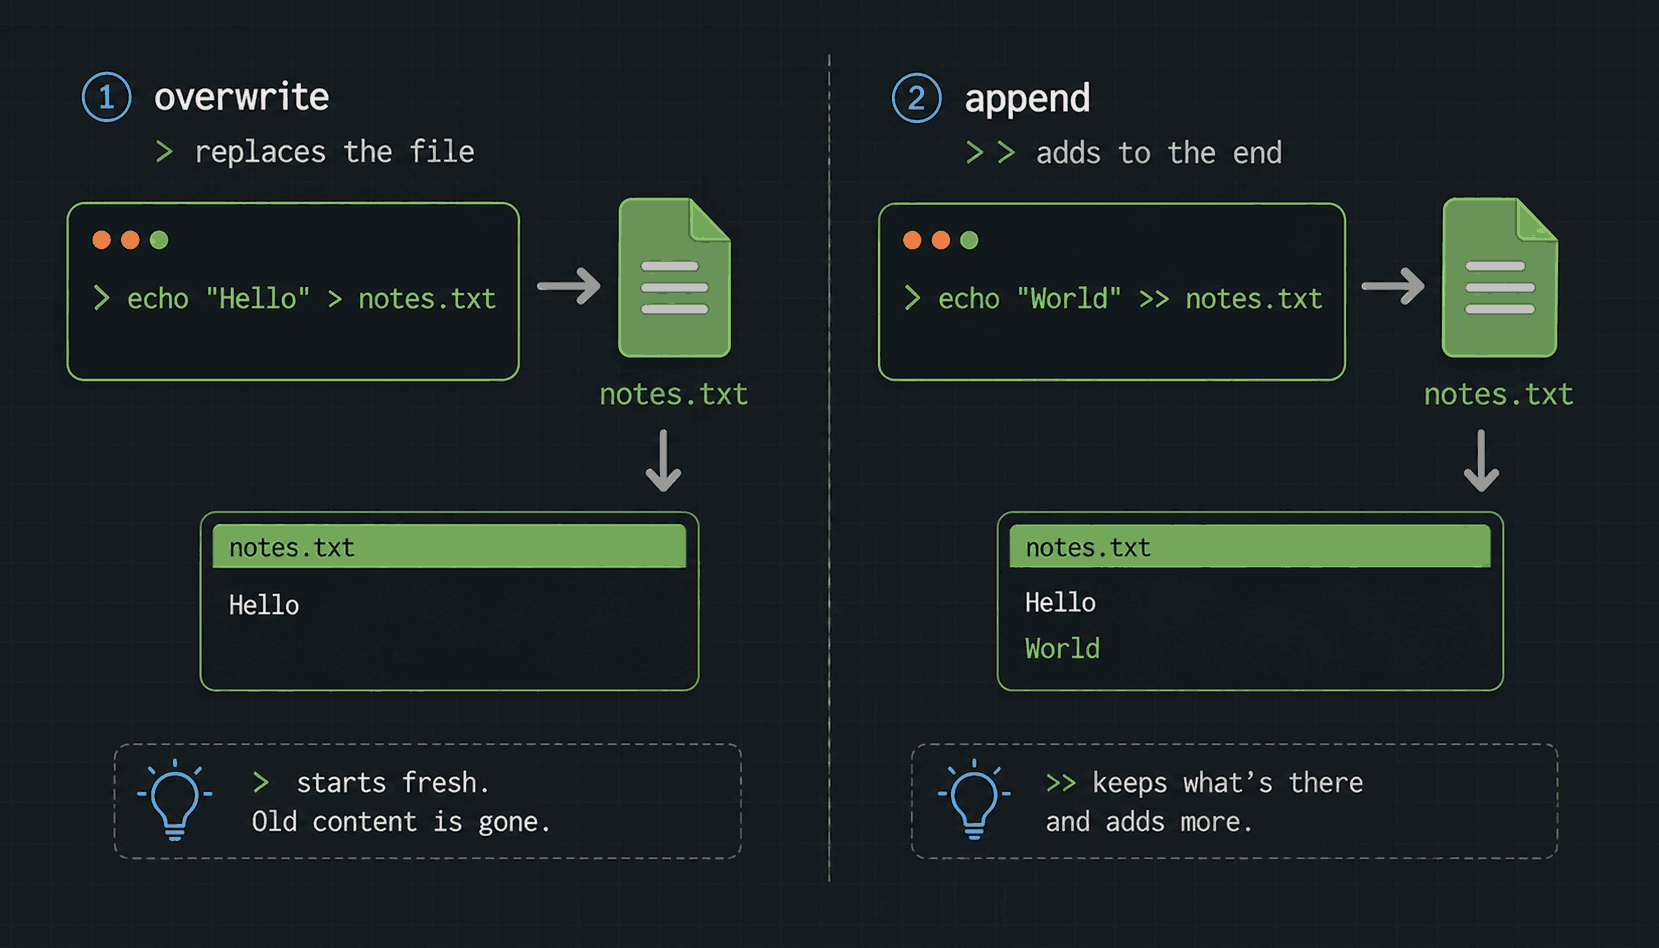
Please read that twice, because this is the command in this lesson that can actually cost you something. There is no warning and no undo. A single arrow pointed at a file that already had a thousand lines in it leaves you with one line and no way back. When you are not sure which you want, use two arrows — adding a line you did not need is a nuisance, and deleting a file you did need is a bad afternoon.
Both forms create the file if it does not exist yet, so you never have to touch it first. And you can read the result with a command you already know:
cat deploy.logFinding the line that matters: grep
This is the command that will change how you work. grep searches inside files and prints only the lines that match:
grep -i linux notes.txtThe word Linux is in your first line, so grep prints that line and nothing else. The -i means ignore case, so it matches Linux, linux and LINUX alike. Use -i almost always — you rarely care about capitalisation, and leaving it off is a common reason a search finds nothing when the word is definitely there.
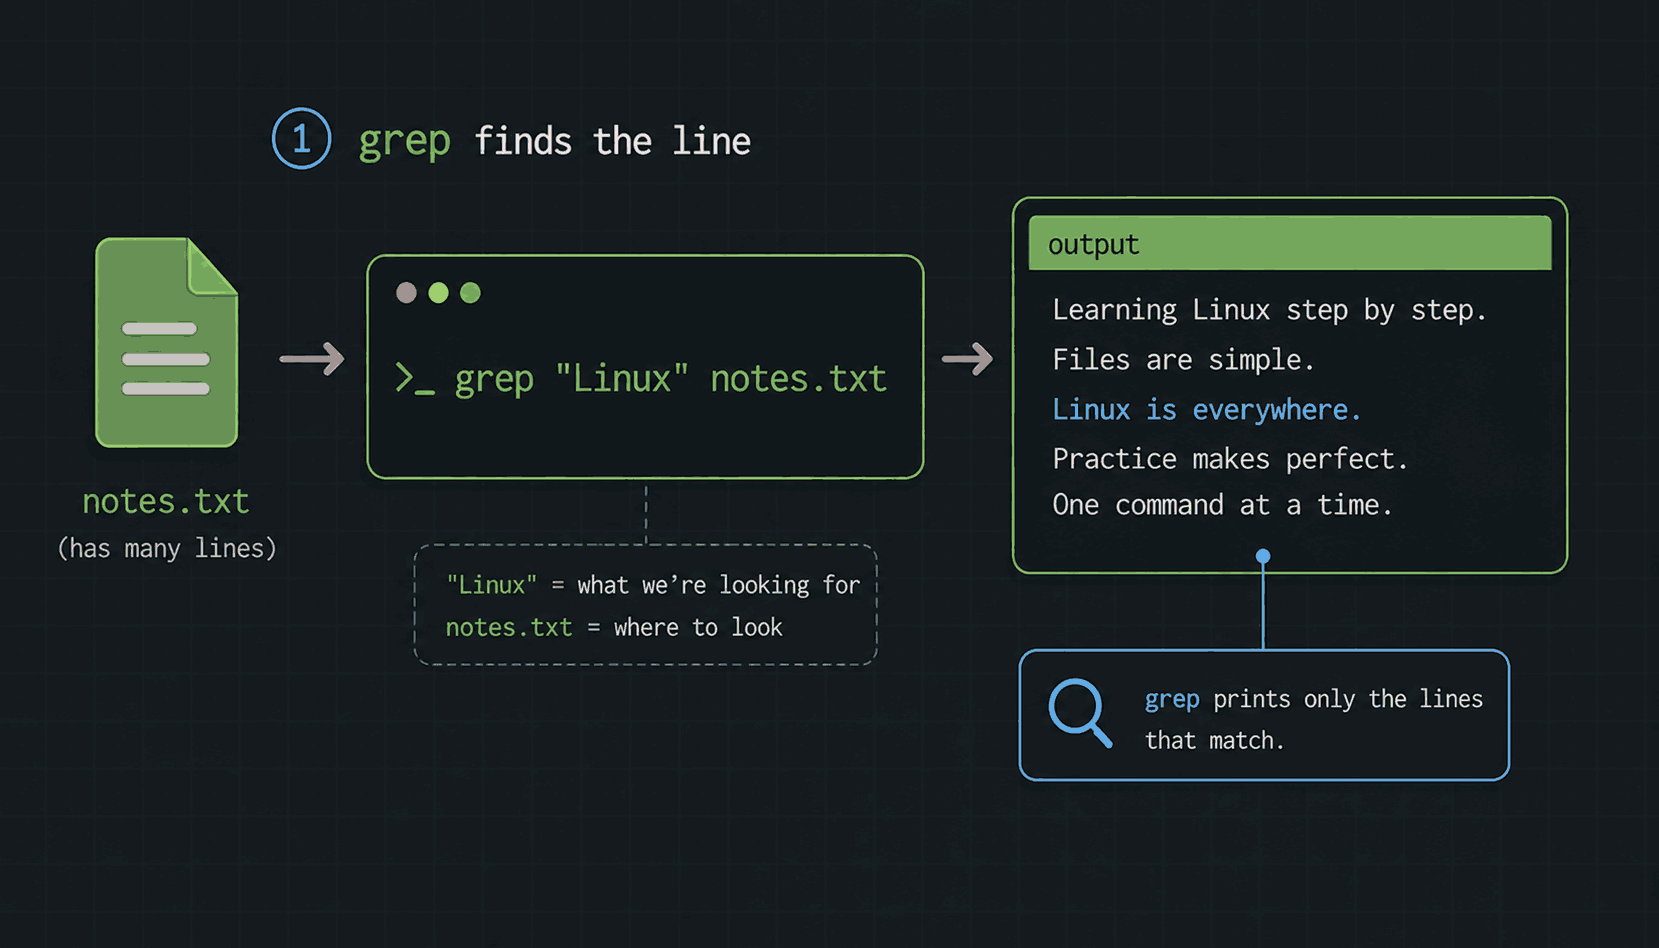
On a four-line file that is a party trick. On a real system it is the job. A busy application writes hundreds of thousands of log lines a day, and when something breaks you do not read them — you search them:
grep -i error app.log
grep -i "timeout" app.log
grep "192.168.1.50" access.log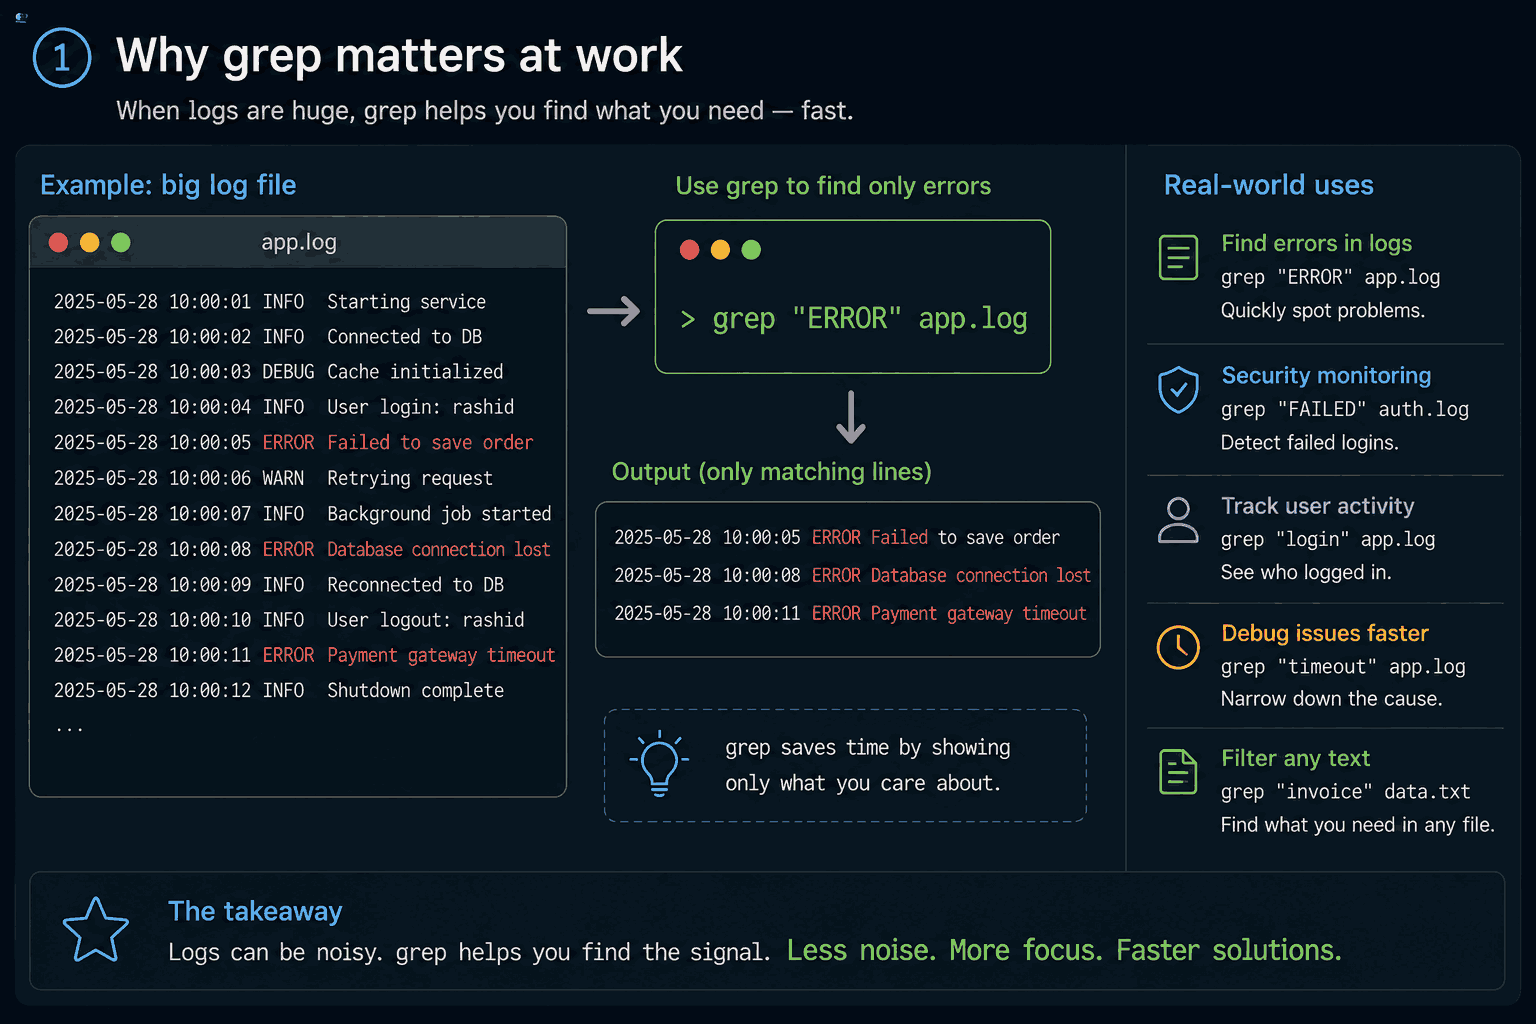
Three more flags earn their keep quickly:
grep -c error app.log
grep -n error app.log
grep -r "DATABASE_URL" /etc- →-c counts the matches instead of printing them. Good for answering how bad is it — three errors or thirty thousand.
- →-n shows the line number of each match, so you can jump straight to it in an editor.
- →-r searches every file in a folder and all its subfolders, which is how you find which config file a setting is hiding in.
One caution, since the video mentions searching logs for a user's details. Log files often hold personal data — emails, IP addresses, names. Searching them is a normal part of the job, but it is someone's information, so only do it when you have a genuine reason and the right to. Good habits here start on day one, not on the day you first touch production.
Practise this properly
Reading this teaches you very little. Fifteen minutes of typing teaches you the whole lesson. Open the Linux Playground or your own machine and run this from start to finish:
# make a file and write four lines in it
touch notes.txt
nano notes.txt        # type something, then Ctrl+O, Enter, Ctrl+X

# read it back three different ways
cat notes.txt
head -n 2 notes.txt
tail -n 2 notes.txt

# build a log file one line at a time
echo "build started" > deploy.log
echo "tests passed" >> deploy.log
echo "deploy done" >> deploy.log
cat deploy.log

# now break it on purpose, and see what one arrow does
echo "oops" > deploy.log
cat deploy.log

# search
grep -i deploy deploy.log
grep -c "" notes.txt
That one deliberate mistake in the middle is the most valuable line in the block. Watch three lines of work disappear because you typed one arrow instead of two, on a file that does not matter, and you will never do it on a file that does.
Every command in this lesson is written out in the course repo at github.com/codewithmuh/linux-course, so you can work through the list without scrubbing back through the video. The same notes are at devopsbymuh.com/learn/linux.
What's next
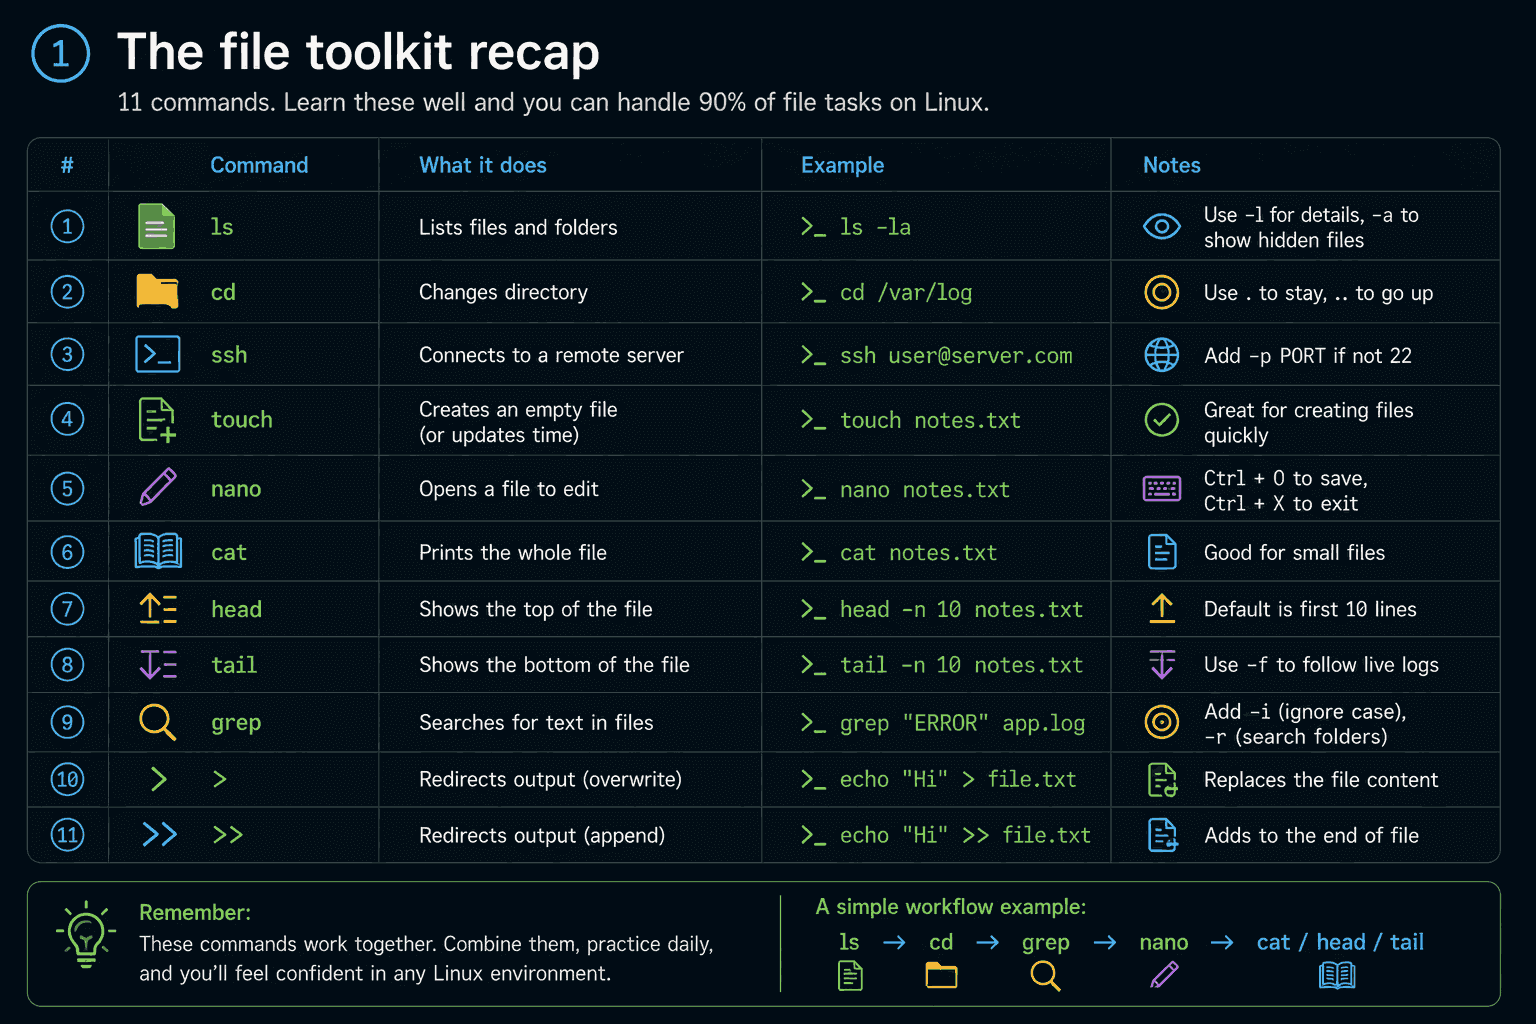
You can now create a file, edit it, read it back, add to it without opening an editor, and search inside it. That is most of what anyone does to a file on a server. Here is the whole lesson in seven lines:
- →touch makes an empty file. nano edits it — Control + O to save, Enter to confirm, Control + X to leave.
- →The caret in nano's menu means the Control key. That is why Control + X looks like ^X on screen.
- →cat prints a whole file, which is perfect for short ones and wrong for logs. Use less for anything long.
- →head -n 5 gives you the top, tail -n 5 gives you the bottom, and tail -f follows a log live as it is written.
- →echo prints text. One arrow writes it to a file and destroys what was there. Two arrows add it to the end.
- →grep -i finds the lines that match and ignores case. On a real log it turns 200,000 lines into the three you need.
- →-c counts matches, -n shows line numbers, -r searches a whole folder tree.
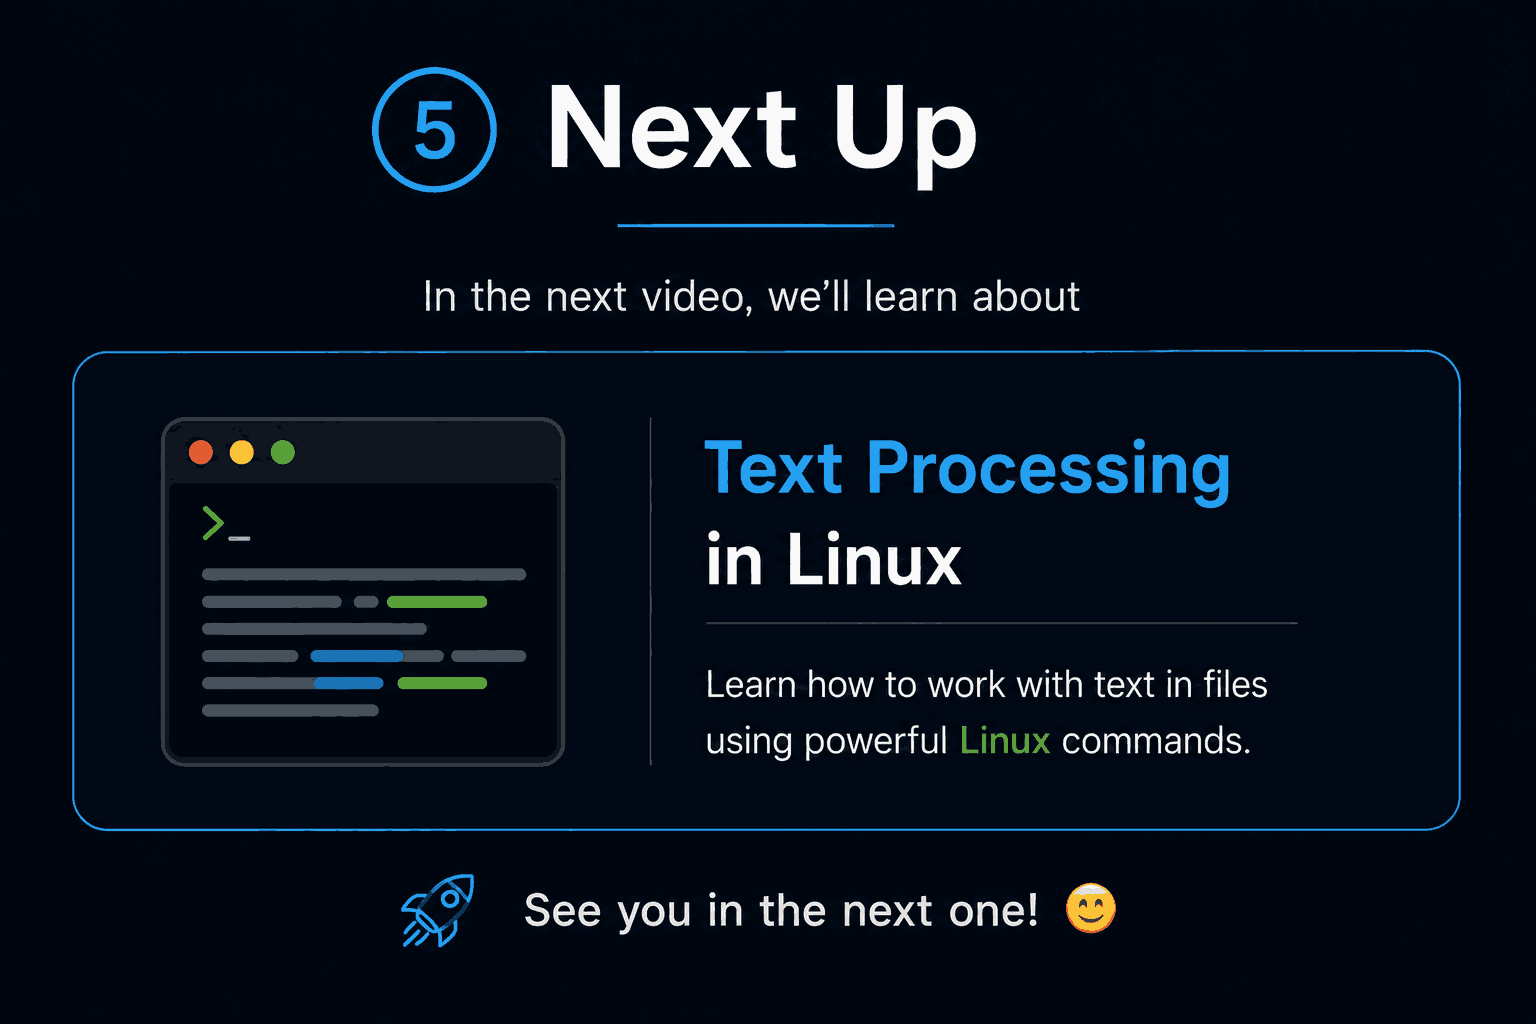
Part five is text processing, and it is where these commands stop being separate tools and start working together. The pipe symbol takes the output of one command and feeds it into the next, so you can grep a log, sort the results, count the duplicates and get an answer in a single line. Add cut, sort, uniq, wc and awk and you can pull a real answer out of a messy file in seconds. That is the lesson where the terminal stops feeling fast and starts feeling powerful. See you there.
$ ./work-with-me.sh
Want this in your job, not just your notes?
I take engineers from wherever they are to hired-in-6-months — real projects, code reviews, and mock interviews. Or if you just need a hand shipping something to production, let's work together.
or subscribe on YouTube — free, forever.
$ subscribe --new-articles
Get new articles in your inbox
One email when a new hands-on guide goes live — Kubernetes, AWS, CI/CD, MLOps. No spam, unsubscribe anytime.